

Category: Microsoft
Category Archives: Microsoft

How do I fix a QuickBooks Registration Error after update?
Troubleshooting Solutions : QuickBooks Registration Error
Encountering a QuickBooks Registration Error can be frustrating, but there are several troubleshooting steps you can take to resolve this issue and get back to using your software smoothly. Here are some potential solutions to try:
Check Internet Connection: Ensure that your computer has a stable internet connection. QuickBooks requires an active internet connection for registration. If your connection is unstable or not working, try restarting your router or connecting to a different network.
Update QuickBooks: Make sure you’re using the latest version of QuickBooks. Outdated software can sometimes encounter registration errors due to compatibility issues or bugs. Update QuickBooks to the latest version available, which may include fixes for registration-related issues.
Verify System Date and Time: Incorrect system date and time settings can sometimes interfere with QuickBooks registration. Verify that your computer’s date and time settings are accurate. If they’re incorrect, adjust them to the current date and time and then try registering QuickBooks again.
Disable Firewall and Antivirus: Sometimes, firewall or antivirus software installed on your computer can block QuickBooks from connecting to the registration servers. Temporarily disable any firewall or antivirus software and attempt to register QuickBooks again. Remember to re-enable them once the registration process is complete.
Run QuickBooks Tool Hub: QuickBooks Tool Hub is a collection of tools designed to troubleshoot various QuickBooks issues, including registration errors. Download and install the QuickBooks Tool Hub from the official Intuit website. Once installed, open the tool and navigate to the “Installation Issues” tab. Run the “QuickBooks Install Diagnostic Tool” to scan and repair any installation-related issues that may be causing the registration error.
Manually Register QuickBooks: If the automatic registration process fails, you can try registering QuickBooks manually. Visit the QuickBooks registration page on the official Intuit website and follow the instructions to manually enter your license and product information. Make sure to double-check the information you enter to avoid any typos or mistakes.
Contact QuickBooks Support: If you’ve tried all the above solutions and are still unable to resolve the registration error, it’s time to reach out to QuickBooks customer support for further assistance. They have dedicated professionals who can provide personalized help and guide you through the troubleshooting process.
By following these troubleshooting solutions, you should be able to resolve the QuickBooks Registration Error and regain access to your QuickBooks software without any further hindrance. If you encounter any difficulties along the way, don’t hesitate to seek assistance from QuickBooks support or consult online forums for additional guidance.
Troubleshooting Solutions : QuickBooks Registration Error Encountering a QuickBooks Registration Error can be frustrating, but there are several troubleshooting steps you can take to resolve this issue and get back to using your software smoothly. Here are some potential solutions to try: Check Internet Connection: Ensure that your computer has a stable internet connection. QuickBooks requires an active internet connection for registration. If your connection is unstable or not working, try restarting your router or connecting to a different network.Update QuickBooks: Make sure you’re using the latest version of QuickBooks. Outdated software can sometimes encounter registration errors due to compatibility issues or bugs. Update QuickBooks to the latest version available, which may include fixes for registration-related issues.Verify System Date and Time: Incorrect system date and time settings can sometimes interfere with QuickBooks registration. Verify that your computer’s date and time settings are accurate. If they’re incorrect, adjust them to the current date and time and then try registering QuickBooks again.Disable Firewall and Antivirus: Sometimes, firewall or antivirus software installed on your computer can block QuickBooks from connecting to the registration servers. Temporarily disable any firewall or antivirus software and attempt to register QuickBooks again. Remember to re-enable them once the registration process is complete.Run QuickBooks Tool Hub: QuickBooks Tool Hub is a collection of tools designed to troubleshoot various QuickBooks issues, including registration errors. Download and install the QuickBooks Tool Hub from the official Intuit website. Once installed, open the tool and navigate to the “Installation Issues” tab. Run the “QuickBooks Install Diagnostic Tool” to scan and repair any installation-related issues that may be causing the registration error.Manually Register QuickBooks: If the automatic registration process fails, you can try registering QuickBooks manually. Visit the QuickBooks registration page on the official Intuit website and follow the instructions to manually enter your license and product information. Make sure to double-check the information you enter to avoid any typos or mistakes.Contact QuickBooks Support: If you’ve tried all the above solutions and are still unable to resolve the registration error, it’s time to reach out to QuickBooks customer support for further assistance. They have dedicated professionals who can provide personalized help and guide you through the troubleshooting process.By following these troubleshooting solutions, you should be able to resolve the QuickBooks Registration Error and regain access to your QuickBooks software without any further hindrance. If you encounter any difficulties along the way, don’t hesitate to seek assistance from QuickBooks support or consult online forums for additional guidance. Read More
I can’t change the profile picture of my account
When I am trying to do that, an error pops up and says “Account Picture Error. This picture couldn’t be saved.”
Error code: 0x80070520
When I am trying to do that, an error pops up and says “Account Picture Error. This picture couldn’t be saved.” Error code: 0x80070520 Read More
Bookings Buffer Time – details noted within calendar appointment
We have a huge list of ‘Services’ in our company Bookings profile, where we use the links to send to clients to book appointments. We include buffer time for most of these services.
In the past, I’m pretty sure (though don’t quote me) that when an appointment was booked by a client, it would go into my colleagues calendar and within the notes section of the appointment it would always show the buffer time as per the example below:
Buffer time:
——————–
Before: 90min (10:15).
Time with customer: 11:45–13:45
After: 90min (15:15)
Time zone:(UTC+00:00) Dublin, Edinburgh, Lisbon, London
However, now, loads of the appointments being booked don’t detail the buffer time in my colleagues calendar appointments! Some do, some don’t.
For example, something could be booked for 9-9.30am by a client with 15 minutes buffer either side. It will go into my colleagues calendar as 8.45-9.45am, but the calendar appointment will not show any details of buffer time vs actual time with customer. So he thinks the call is starting at 8.45am, not 9am.
I’ve played around with settings but I cannot find the answer.
Please help!
We have a huge list of ‘Services’ in our company Bookings profile, where we use the links to send to clients to book appointments. We include buffer time for most of these services. In the past, I’m pretty sure (though don’t quote me) that when an appointment was booked by a client, it would go into my colleagues calendar and within the notes section of the appointment it would always show the buffer time as per the example below: Buffer time:——————–Before: 90min (10:15).Time with customer: 11:45–13:45After: 90min (15:15)Time zone:(UTC+00:00) Dublin, Edinburgh, Lisbon, LondonHowever, now, loads of the appointments being booked don’t detail the buffer time in my colleagues calendar appointments! Some do, some don’t. For example, something could be booked for 9-9.30am by a client with 15 minutes buffer either side. It will go into my colleagues calendar as 8.45-9.45am, but the calendar appointment will not show any details of buffer time vs actual time with customer. So he thinks the call is starting at 8.45am, not 9am. I’ve played around with settings but I cannot find the answer. Please help! Read More
Mobile device user accounts – Device or Human Worker
Scenario:
A client has several third party warehouses that will be added as a Supply Chain user with Microsoft Entra ID and an employee record. This follows the human worker approach as per the documentation below:
Mobile device user accounts – Supply Chain Management | Dynamics 365 | Microsoft Learn
Question:
If the third party warehouse is setup as a human worker, are we correct that a device license is not required? Only the SCM license?
Scenario:A client has several third party warehouses that will be added as a Supply Chain user with Microsoft Entra ID and an employee record. This follows the human worker approach as per the documentation below: Mobile device user accounts – Supply Chain Management | Dynamics 365 | Microsoft Learn Question:If the third party warehouse is setup as a human worker, are we correct that a device license is not required? Only the SCM license? Read More

Learn Azure Together in Microsoft Learn Learning Room
In the summer of 2023, Microsoft Learn introduced the Microsoft Learn Learning Room, a new addition that allows community members worldwide to interact online and learn about technology. The Learning Room is part of the Microsoft Learn Community, and each Learning Room is managed by Microsoft Learn experts. It serves as an online community where users can connect with experts to gain deeper insight into Microsoft products and services.
One of the Microsoft Learn experts is Hamid Sadeghpour Saleh, an Azure MVP from Azerbaijan, who is also a Microsoft MVP. He manages the Learning Room alongside fellow Microsoft Learn experts Saeid Dahl and Mohsen Akhavan. We spoke with Hamid about the significance of participating in the Microsoft Zero to Hero Community Learning Room. Whether you are already a member of the Learning Room or have yet to join, we invite you to read this article and explore the new learning opportunities that this community offers.
———-
Introduction of Microsoft Zero to Hero Community
Microsoft Zero to Hero Community is a Learning Room on Microsoft Learn and We’re here to cover all the aspects of Microsoft Cloud Services from Azure to Microsoft AI and Data – following our room title “Zero to Hero” We’re here together to grow as passionate Microsoft Cloud experts.
Who are the members in the Microsoft Zero to Hero Community?
We have a variety of members in the Learning Room, from students, learners, new starters to experienced professionals, MVPs, RDs and Microsoft FTEs who contribute all together with AMA sessions, Q/A, blogging, weekly and monthly sessions to all share together and that is the main idea of the Learning Room.
What topics are discussed in the Microsoft Zero to Hero Community?
Since we are covering Microsoft Cloud Technologies in general, we host sessions from Microsoft Azure services to Microsoft AI, Data, Security etc. as well as all of the activities and channels we have are Technology focused on different ways and areas and that helps us and learners to land on their favorite learning path and get specialized and certified.
How do you support the skill development of members?
As an MVP and learning room owner, I support the skill development of members by facilitating interactive discussions, organizing workshops, sharing resources, and providing mentorship. I create a supportive environment where members can learn from each other’s expertise, collaborate on projects, and stay updated on the latest technologies and best practices. Additionally, I offer personalized guidance and feedback to help members overcome challenges and achieve their learning goals.
Invitation for those who are interested in participating in your Learning Room
Join Microsoft Zero to Hero Learning Room!
Unlock endless opportunities for growth and collaboration. Engage in interactive discussions, attend workshops, and access resources curated for your success. Let’s learn and excel together!
Resources for learners who want to join
– Link to join to the Learning Room: https://aka.ms/JoinZerotoHero
– Learning Room LinkedIn: https://www.linkedin.com/company/azure-zero-to-hero/
– Learning Room YouTube Channel: https://www.youtube.com/@azurezerotohero
———-
For more insights into Azure skills development as discussed by Hamid, please refer to the article on the Microsoft Learn Blog: Discover Microsoft Azure learning, training, certifications, and career path opportunities – Microsoft Community Hub
In addition to the Microsoft Zero to Hero Community featured in this article, the Microsoft Learn Learning Room operates various Learning Rooms for different products, services, and languages. We encourage you to explore the Microsoft Learn – Learning Rooms Directory, find a Learning Room that matches your interests, connect with new peers, and deepen your technical knowledge as a part of this learning community.
Microsoft Tech Community – Latest Blogs –Read More
Add a signature field and restrict editing
Hi,
We’re looking for a way to add a signature box where a user can draw or sign while the document is restricted. The user should be able to sign using Word Online, Desktop App, Tablet and Mobile. Please let us know the best way to achieve this.
Hi, We’re looking for a way to add a signature box where a user can draw or sign while the document is restricted. The user should be able to sign using Word Online, Desktop App, Tablet and Mobile. Please let us know the best way to achieve this. Read More

How fix QuickBooks desktop 2023 running slow?
Troubleshooting Solutions : QuickBooks desktop 2023 running slow
Slow performance in QuickBooks desktop 2023 running slow can be frustrating, but several factors and solutions can address this issue and improve system responsiveness:
Check System Requirements: Ensure that your computer meets the minimum system requirements for running QuickBooks Desktop 2023. Inadequate hardware, such as insufficient RAM or an outdated processor, can contribute to sluggish performance.
Update QuickBooks: Make sure you are using the latest version of QuickBooks Desktop 2023. Intuit frequently releases updates that include performance improvements, bug fixes, and optimizations. Check for updates within QuickBooks and install any available updates.
Reduce Company File Size: Large company files can slow down QuickBooks performance. Consider condensing your company file or archiving old data to reduce its size. You can also remove unnecessary lists, such as customers or vendors, to streamline the file.
Optimize Data File: Use the built-in QuickBooks tools to optimize your data file. This process reorganizes data within the file, improving its performance. Go to the “File” menu, select “Utilities,” and then choose “Optimize Data File.” Follow the prompts to complete the optimization.
Limit Background Processes: Close any unnecessary programs and background processes running on your computer while using QuickBooks. Other applications consuming system resources can impact QuickBooks performance. Additionally, avoid running resource-intensive tasks simultaneously with QuickBooks.
Adjust Preferences and Settings: Review QuickBooks preferences and settings to optimize performance. Disable features or options that you don’t use frequently, such as automatic updates or reminders. Customizing preferences can reduce unnecessary processing overhead.
Rebuild Data: Rebuilding data can resolve issues with data integrity and improve QuickBooks performance. To rebuild data, go to the “File” menu, select “Utilities,” and then choose “Rebuild Data.” Follow the on-screen instructions to complete the rebuilding process.
Check for Network Issues: If QuickBooks is installed in a network environment, network issues can contribute to slow performance. Check network connectivity, router settings, and network congestion. Consider consulting with a network technician to optimize network performance.
Upgrade Hardware: If your computer hardware is outdated or insufficient for running QuickBooks Desktop 2023, consider upgrading components such as RAM, CPU, or storage. A faster and more capable hardware configuration can significantly improve QuickBooks performance.
Run QuickBooks Diagnostic Tool: Utilize the QuickBooks Diagnostic Tool to identify and resolve potential issues with QuickBooks Desktop 2023. This tool can diagnose and fix various performance-related problems, including database issues and network connectivity issues.
Contact QuickBooks Support: If the performance issues persist despite trying the above solutions, consider contacting QuickBooks support for further assistance. QuickBooks support representatives can provide personalized troubleshooting guidance and help resolve complex performance issues.
By implementing these troubleshooting solutions, you can address slow performance in QuickBooks desktop 2023 running slow and restore efficient operation, enhancing productivity for your business.
Troubleshooting Solutions : QuickBooks desktop 2023 running slow Slow performance in QuickBooks desktop 2023 running slow can be frustrating, but several factors and solutions can address this issue and improve system responsiveness: Check System Requirements: Ensure that your computer meets the minimum system requirements for running QuickBooks Desktop 2023. Inadequate hardware, such as insufficient RAM or an outdated processor, can contribute to sluggish performance.Update QuickBooks: Make sure you are using the latest version of QuickBooks Desktop 2023. Intuit frequently releases updates that include performance improvements, bug fixes, and optimizations. Check for updates within QuickBooks and install any available updates.Reduce Company File Size: Large company files can slow down QuickBooks performance. Consider condensing your company file or archiving old data to reduce its size. You can also remove unnecessary lists, such as customers or vendors, to streamline the file.Optimize Data File: Use the built-in QuickBooks tools to optimize your data file. This process reorganizes data within the file, improving its performance. Go to the “File” menu, select “Utilities,” and then choose “Optimize Data File.” Follow the prompts to complete the optimization.Limit Background Processes: Close any unnecessary programs and background processes running on your computer while using QuickBooks. Other applications consuming system resources can impact QuickBooks performance. Additionally, avoid running resource-intensive tasks simultaneously with QuickBooks.Adjust Preferences and Settings: Review QuickBooks preferences and settings to optimize performance. Disable features or options that you don’t use frequently, such as automatic updates or reminders. Customizing preferences can reduce unnecessary processing overhead.Rebuild Data: Rebuilding data can resolve issues with data integrity and improve QuickBooks performance. To rebuild data, go to the “File” menu, select “Utilities,” and then choose “Rebuild Data.” Follow the on-screen instructions to complete the rebuilding process.Check for Network Issues: If QuickBooks is installed in a network environment, network issues can contribute to slow performance. Check network connectivity, router settings, and network congestion. Consider consulting with a network technician to optimize network performance.Upgrade Hardware: If your computer hardware is outdated or insufficient for running QuickBooks Desktop 2023, consider upgrading components such as RAM, CPU, or storage. A faster and more capable hardware configuration can significantly improve QuickBooks performance.Run QuickBooks Diagnostic Tool: Utilize the QuickBooks Diagnostic Tool to identify and resolve potential issues with QuickBooks Desktop 2023. This tool can diagnose and fix various performance-related problems, including database issues and network connectivity issues.Contact QuickBooks Support: If the performance issues persist despite trying the above solutions, consider contacting QuickBooks support for further assistance. QuickBooks support representatives can provide personalized troubleshooting guidance and help resolve complex performance issues.By implementing these troubleshooting solutions, you can address slow performance in QuickBooks desktop 2023 running slow and restore efficient operation, enhancing productivity for your business. Read More
KQL query for non-matching entries
Hi,
I am trying to write a query to find out the devices that does not have MDE installed by comparing it with those devices found in CommonSecurity Table. The actual no. of devices is approx. 50, however I want to write a query to do this
When tried leftanti/leftantisemi the no. of devices it shows in the result is incorrect. (approx. 1000)
let mde_devices= materialize (
DeviceInfo
| where TimeGenerated >= ago(7d)
| where OSPlatform !has ‘server’
| summarize arg_max(TimeGenerated, PublicIP, LoggedOnUsers) by DeviceName
| parse-kv LoggedOnUsers as ( [‘UserName’]:string) with ( pair_delimiter=”,”, kv_delimiter=”:”, quote='”‘)
| where isnotempty(UserName)
| extend HostName = toupper(trim_end(char_trim,DeviceName))
| distinct HostName
);
let zscaler_devices = (
CommonSecurityLog
| where TimeGenerated >= ago(7d)
| where DeviceProduct == ‘NSSWeblog’
| where AdditionalExtensions !in~ (mde_devices)
| parse AdditionalExtensions with * ‘SourceTranslatedAddress=’ IPAddress ‘;UserAgent=’ * ‘;User=’ UserName_CS ‘;Department=’ * ‘DeviceHostname=’ Hostname_CS ‘;DeviceModel=’ *
| summarize arg_max(TimeGenerated,UserName_CS, IPAddress) by Hostname_CS
| distinct Hostname_CS
| extend HostName = tolower(Hostname_CS)
| project-away Hostname_CS);
zscaler_devices
//| where HostName in (mde_devices)
| join kind=leftanti mde_devices on HostName// == $right.HostName
So, I switched to using not() (refer line 14) and it is the closest match it’s output still shows devices that has MDE. It lists 80 devices as the output and the extra 30 its showing is having MDE
let mde_devices= materialize (
DeviceInfo
| where TimeGenerated >= ago(7d)
| where OSPlatform !has ‘server’
| summarize arg_max(TimeGenerated, PublicIP, LoggedOnUsers) by DeviceName
| parse-kv LoggedOnUsers as ( [‘UserName’]:string) with ( pair_delimiter=”,”, kv_delimiter=”:”, quote='”‘)
| where isnotempty(UserName)
| extend HostName = toupper(trim_end(char_trim,DeviceName))
| distinct HostName
);
CommonSecurityLog
| where TimeGenerated >= ago(7d)
| where DeviceProduct == ‘NSSWeblog’
| where not(AdditionalExtensions has_any (mde_devices))
| parse AdditionalExtensions with * ‘SourceTranslatedAddress=’ IPAddress ‘;UserAgent=’ * ‘;User=’ UserName_CS ‘;Department=’ * ‘DeviceHostname=’ Hostname_CS ‘;DeviceModel=’ *
| summarize arg_max(TimeGenerated,UserName_CS, IPAddress) by Hostname_CS
| extend HostName = tolower(Hostname_CS)
| project-away Hostname_CS
My question here are:
1. Although anti/semianti is supposed to give me the intended results, what is wrong with my query ?
2. While using the not() operator, what additional step I should carry out to make sure my results do not consist of devices having MDE ?
Hi, I am trying to write a query to find out the devices that does not have MDE installed by comparing it with those devices found in CommonSecurity Table. The actual no. of devices is approx. 50, however I want to write a query to do this When tried leftanti/leftantisemi the no. of devices it shows in the result is incorrect. (approx. 1000) let mde_devices= materialize (
DeviceInfo
| where TimeGenerated >= ago(7d)
| where OSPlatform !has ‘server’
| summarize arg_max(TimeGenerated, PublicIP, LoggedOnUsers) by DeviceName
| parse-kv LoggedOnUsers as ( [‘UserName’]:string) with ( pair_delimiter=”,”, kv_delimiter=”:”, quote='”‘)
| where isnotempty(UserName)
| extend HostName = toupper(trim_end(char_trim,DeviceName))
| distinct HostName
);
let zscaler_devices = (
CommonSecurityLog
| where TimeGenerated >= ago(7d)
| where DeviceProduct == ‘NSSWeblog’
| where AdditionalExtensions !in~ (mde_devices)
| parse AdditionalExtensions with * ‘SourceTranslatedAddress=’ IPAddress ‘;UserAgent=’ * ‘;User=’ UserName_CS ‘;Department=’ * ‘DeviceHostname=’ Hostname_CS ‘;DeviceModel=’ *
| summarize arg_max(TimeGenerated,UserName_CS, IPAddress) by Hostname_CS
| distinct Hostname_CS
| extend HostName = tolower(Hostname_CS)
| project-away Hostname_CS);
zscaler_devices
//| where HostName in (mde_devices)
| join kind=leftanti mde_devices on HostName// == $right.HostName So, I switched to using not() (refer line 14) and it is the closest match it’s output still shows devices that has MDE. It lists 80 devices as the output and the extra 30 its showing is having MDE let mde_devices= materialize (
DeviceInfo
| where TimeGenerated >= ago(7d)
| where OSPlatform !has ‘server’
| summarize arg_max(TimeGenerated, PublicIP, LoggedOnUsers) by DeviceName
| parse-kv LoggedOnUsers as ( [‘UserName’]:string) with ( pair_delimiter=”,”, kv_delimiter=”:”, quote='”‘)
| where isnotempty(UserName)
| extend HostName = toupper(trim_end(char_trim,DeviceName))
| distinct HostName
);
CommonSecurityLog
| where TimeGenerated >= ago(7d)
| where DeviceProduct == ‘NSSWeblog’
| where not(AdditionalExtensions has_any (mde_devices))
| parse AdditionalExtensions with * ‘SourceTranslatedAddress=’ IPAddress ‘;UserAgent=’ * ‘;User=’ UserName_CS ‘;Department=’ * ‘DeviceHostname=’ Hostname_CS ‘;DeviceModel=’ *
| summarize arg_max(TimeGenerated,UserName_CS, IPAddress) by Hostname_CS
| extend HostName = tolower(Hostname_CS)
| project-away Hostname_CS My question here are:1. Although anti/semianti is supposed to give me the intended results, what is wrong with my query ?2. While using the not() operator, what additional step I should carry out to make sure my results do not consist of devices having MDE ? Read More

How to fix QuickBooks desktop 2024 running slow?
Troubleshooting Solutions : QuickBooks desktop 2024 running slow
Slow performance in QuickBooks desktop 2024 running slow can stem from various factors, including system issues, company file size, network problems, or software conflicts. Here’s a comprehensive guide to troubleshoot and resolve this frustrating issue:
Check System Requirements: Ensure your computer meets QuickBooks Desktop 2024’s minimum system requirements. Inadequate hardware can significantly impact performance. Verify that your processor, RAM, and disk space meet the recommended specifications.
Update QuickBooks Desktop: Make sure you’re using the latest version of QuickBooks Desktop 2024. Intuit frequently releases updates that include performance enhancements and bug fixes. Go to the Help menu and select “Update QuickBooks” to download and install any available updates.
Optimize Company File: Over time, your QuickBooks company file can become bloated, leading to sluggish performance. Use the built-in utilities like Condense Data or Clean Up Company Data to remove outdated transactions and reduce file size. Make sure to create a backup before performing these actions.
Rebuild Data: Run the Rebuild Data utility to resolve data integrity issues within your company file. This process can identify and fix errors that might be contributing to the slowdown. To do this, go to the File menu, select Utilities, and then Rebuild Data.
Check for Network Issues: Slow network connectivity can affect QuickBooks performance, especially in multi-user environments. Verify that your network connection is stable and that all network devices are functioning correctly. Consider upgrading your network infrastructure if necessary.
Disable Background Applications: Other software running in the background can consume system resources and impact QuickBooks performance. Close unnecessary applications and disable startup programs to free up resources for QuickBooks.
Increase Performance Preferences: Adjust QuickBooks performance preferences to optimize speed. Go to the Edit menu, select Preferences, then click on Desktop View. Increase the number of rows to display in lists and decrease the number of company file backups to conserve system resources.
Run QuickBooks File Doctor: Utilize the QuickBooks File Doctor tool to diagnose and repair common file-related issues that may be causing slowdowns. This tool can identify network connectivity problems, data corruption, and other issues impacting performance.
Consider Hosting: If you’re experiencing performance issues in a multi-user environment, consider hosting your QuickBooks company file on a dedicated server or using Intuit’s QuickBooks hosting service. This can improve performance by offloading processing tasks to a more powerful server.
Contact QuickBooks Support: If the problem persists after trying these solutions, contact QuickBooks support for further assistance. They can provide personalized troubleshooting and guidance to resolve the issue.
By following these troubleshooting steps, you can effectively address the slowdown issue in QuickBooks desktop 2024 running slow and regain optimal performance for your accounting tasks.
Troubleshooting Solutions : QuickBooks desktop 2024 running slow Slow performance in QuickBooks desktop 2024 running slow can stem from various factors, including system issues, company file size, network problems, or software conflicts. Here’s a comprehensive guide to troubleshoot and resolve this frustrating issue: Check System Requirements: Ensure your computer meets QuickBooks Desktop 2024’s minimum system requirements. Inadequate hardware can significantly impact performance. Verify that your processor, RAM, and disk space meet the recommended specifications.Update QuickBooks Desktop: Make sure you’re using the latest version of QuickBooks Desktop 2024. Intuit frequently releases updates that include performance enhancements and bug fixes. Go to the Help menu and select “Update QuickBooks” to download and install any available updates.Optimize Company File: Over time, your QuickBooks company file can become bloated, leading to sluggish performance. Use the built-in utilities like Condense Data or Clean Up Company Data to remove outdated transactions and reduce file size. Make sure to create a backup before performing these actions.Rebuild Data: Run the Rebuild Data utility to resolve data integrity issues within your company file. This process can identify and fix errors that might be contributing to the slowdown. To do this, go to the File menu, select Utilities, and then Rebuild Data.Check for Network Issues: Slow network connectivity can affect QuickBooks performance, especially in multi-user environments. Verify that your network connection is stable and that all network devices are functioning correctly. Consider upgrading your network infrastructure if necessary.Disable Background Applications: Other software running in the background can consume system resources and impact QuickBooks performance. Close unnecessary applications and disable startup programs to free up resources for QuickBooks.Increase Performance Preferences: Adjust QuickBooks performance preferences to optimize speed. Go to the Edit menu, select Preferences, then click on Desktop View. Increase the number of rows to display in lists and decrease the number of company file backups to conserve system resources.Run QuickBooks File Doctor: Utilize the QuickBooks File Doctor tool to diagnose and repair common file-related issues that may be causing slowdowns. This tool can identify network connectivity problems, data corruption, and other issues impacting performance.Consider Hosting: If you’re experiencing performance issues in a multi-user environment, consider hosting your QuickBooks company file on a dedicated server or using Intuit’s QuickBooks hosting service. This can improve performance by offloading processing tasks to a more powerful server.Contact QuickBooks Support: If the problem persists after trying these solutions, contact QuickBooks support for further assistance. They can provide personalized troubleshooting and guidance to resolve the issue.By following these troubleshooting steps, you can effectively address the slowdown issue in QuickBooks desktop 2024 running slow and regain optimal performance for your accounting tasks. Read More
Searching text in Excel with CoPilot
I’m trying to get CoPilot to search thru a text column in a table and pull out certain data to another column, but I’m not succeeding. Instead it searches and replaces text. I’m trying prompts like “Search A column and copy text similar to “Sold 8 of product X” into C column. Any hints?
I’m trying to get CoPilot to search thru a text column in a table and pull out certain data to another column, but I’m not succeeding. Instead it searches and replaces text. I’m trying prompts like “Search A column and copy text similar to “Sold 8 of product X” into C column. Any hints? Read More

How to Fix QuickBooks Error 3371 status code 1 after update?
Troubleshooting Solutions: QuickBooks Error 3371 status code 1
QuickBooks Error 3371 status code 1 typically occurs when the software is unable to initialize the license properties, commonly due to missing or damaged files. Here are some troubleshooting steps to resolve this issue efficiently:
Update QuickBooks: Ensure you’re using the latest version of QuickBooks. Updates often include bug fixes and patches that can address error codes like 3371.Run QuickBooks Install Diagnostic Tool: Intuit provides a diagnostic tool specifically designed to troubleshoot installation issues. Download and run this tool to identify and fix problems with your QuickBooks installation.Recreate Damaged EntitlementDataStore.ecml File: This file stores your license information. Corrupt or damaged files can trigger Error 3371. To recreate it, close QuickBooks, press Windows + R to open the Run command, type “%ProgramData%IntuitEntitlement Clientv8” (without quotes), and hit Enter. Delete the EntitlementDataStore.ecml file, restart QuickBooks, and re-register the product.Manually Resolve Windows Components: Sometimes, certain Windows components necessary for QuickBooks to function properly might be damaged or missing. Ensure that your Windows operating system is up to date and perform a repair on Microsoft .NET Framework, MSXML, and C++.Update Windows: Keeping your Windows OS updated ensures that all necessary components are current, reducing the likelihood of compatibility issues.Resolve Third-Party Software Conflicts: Conflicts with antivirus or anti-malware software can interfere with QuickBooks operations. Temporarily disable such software and try opening QuickBooks again.Reinstall QuickBooks Using Clean Install: If none of the above steps resolve the issue, perform a clean reinstall of QuickBooks. Uninstall QuickBooks from your system, rename the installation folders, reinstall QuickBooks, and update it to the latest version.Seek Technical Support: If you’ve exhausted all troubleshooting steps and still encounter Error 3371, consider reaching out to QuickBooks technical support. They may provide additional guidance or assistance in resolving the issue.
By following these troubleshooting solutions, you can effectively address QuickBooks Error 3371 status code 1 and resume normal operation of the software without further interruption. Remember to back up your company file before making any significant changes to ensure data integrity.
Troubleshooting Solutions: QuickBooks Error 3371 status code 1 QuickBooks Error 3371 status code 1 typically occurs when the software is unable to initialize the license properties, commonly due to missing or damaged files. Here are some troubleshooting steps to resolve this issue efficiently: Update QuickBooks: Ensure you’re using the latest version of QuickBooks. Updates often include bug fixes and patches that can address error codes like 3371.Run QuickBooks Install Diagnostic Tool: Intuit provides a diagnostic tool specifically designed to troubleshoot installation issues. Download and run this tool to identify and fix problems with your QuickBooks installation.Recreate Damaged EntitlementDataStore.ecml File: This file stores your license information. Corrupt or damaged files can trigger Error 3371. To recreate it, close QuickBooks, press Windows + R to open the Run command, type “%ProgramData%IntuitEntitlement Clientv8” (without quotes), and hit Enter. Delete the EntitlementDataStore.ecml file, restart QuickBooks, and re-register the product.Manually Resolve Windows Components: Sometimes, certain Windows components necessary for QuickBooks to function properly might be damaged or missing. Ensure that your Windows operating system is up to date and perform a repair on Microsoft .NET Framework, MSXML, and C++.Update Windows: Keeping your Windows OS updated ensures that all necessary components are current, reducing the likelihood of compatibility issues.Resolve Third-Party Software Conflicts: Conflicts with antivirus or anti-malware software can interfere with QuickBooks operations. Temporarily disable such software and try opening QuickBooks again.Reinstall QuickBooks Using Clean Install: If none of the above steps resolve the issue, perform a clean reinstall of QuickBooks. Uninstall QuickBooks from your system, rename the installation folders, reinstall QuickBooks, and update it to the latest version.Seek Technical Support: If you’ve exhausted all troubleshooting steps and still encounter Error 3371, consider reaching out to QuickBooks technical support. They may provide additional guidance or assistance in resolving the issue. By following these troubleshooting solutions, you can effectively address QuickBooks Error 3371 status code 1 and resume normal operation of the software without further interruption. Remember to back up your company file before making any significant changes to ensure data integrity. Read More
Monitor Azure VM Linux Mount Point Availablity
Hi Team,
Sorry if it’s a very basic question.
Could you please suggest how can we monitor mounted disks on Azure VM for its availability?
In past especially in case of On-Prem setup, we’ve faced and issue where due to some changes or patches etc. the mounted disks go missing.
And hence want to monitor and setup alert for the same in case those are missing.
Could you please suggest if there’s a way to do so, may be via some KQL using VM Insights or any other simpler solution?
Thanks.
Hi Team, Sorry if it’s a very basic question.Could you please suggest how can we monitor mounted disks on Azure VM for its availability? In past especially in case of On-Prem setup, we’ve faced and issue where due to some changes or patches etc. the mounted disks go missing. And hence want to monitor and setup alert for the same in case those are missing. Could you please suggest if there’s a way to do so, may be via some KQL using VM Insights or any other simpler solution? Thanks. Read More

How do I fix QuickBooks Error 3371 status code 11104 after update?
Troubleshooting Solutions: QuickBooks Error 3371 status code 11104
QuickBooks Error 3371 status code 11104 typically arises due to issues with the software’s licensing or damaged components. Here are some effective troubleshooting steps to resolve this error promptly:
Update QuickBooks: Start by ensuring that your QuickBooks software is up to date. Installing the latest updates often includes bug fixes and patches that can address error codes like 3371.Run QuickBooks Install Diagnostic Tool: Intuit provides a diagnostic tool designed to identify and resolve installation issues. Download and run this tool to diagnose and fix any problems with your QuickBooks installation.Recreate EntitlementDataStore.ecml File: This file stores your QuickBooks license information. If it’s damaged or corrupted, it can trigger Error 3371. Close QuickBooks, press Windows + R to open the Run command, type “%ProgramData%IntuitEntitlement Clientv8” (without quotes), and hit Enter. Delete the EntitlementDataStore.ecml file, restart QuickBooks, and re-register the product.Update Windows Components: Ensure that your Windows operating system is up to date, including components like Microsoft .NET Framework, MSXML, and C++. Outdated or damaged Windows components can interfere with QuickBooks functionality.Perform a Clean Install of QuickBooks: If the issue persists, consider performing a clean reinstall of QuickBooks. Uninstall QuickBooks from your system, rename the installation folders, reinstall QuickBooks, and then update it to the latest version.Check for Third-Party Software Conflicts: Sometimes, conflicts with third-party software such as antivirus or anti-malware programs can cause issues with QuickBooks. Temporarily disable these programs and try opening QuickBooks again to see if the error persists.Repair QuickBooks Installation: Use the Control Panel to repair your QuickBooks installation. Go to Control Panel > Programs and Features, select QuickBooks from the list, and click on Repair. Follow the on-screen instructions to complete the repair process.Seek Technical Support: If you’ve tried all the troubleshooting steps above and are still experiencing Error 3371 status code 11104, consider contacting QuickBooks technical support for further assistance. They can provide personalized guidance and help you resolve the issue.
By following these troubleshooting solutions, you can effectively address QuickBooks Error 3371 status code 11104 and resume normal operation of the software without further interruption. Remember to back up your company file before making any significant changes to ensure data integrity.
Troubleshooting Solutions: QuickBooks Error 3371 status code 11104 QuickBooks Error 3371 status code 11104 typically arises due to issues with the software’s licensing or damaged components. Here are some effective troubleshooting steps to resolve this error promptly: Update QuickBooks: Start by ensuring that your QuickBooks software is up to date. Installing the latest updates often includes bug fixes and patches that can address error codes like 3371.Run QuickBooks Install Diagnostic Tool: Intuit provides a diagnostic tool designed to identify and resolve installation issues. Download and run this tool to diagnose and fix any problems with your QuickBooks installation.Recreate EntitlementDataStore.ecml File: This file stores your QuickBooks license information. If it’s damaged or corrupted, it can trigger Error 3371. Close QuickBooks, press Windows + R to open the Run command, type “%ProgramData%IntuitEntitlement Clientv8” (without quotes), and hit Enter. Delete the EntitlementDataStore.ecml file, restart QuickBooks, and re-register the product.Update Windows Components: Ensure that your Windows operating system is up to date, including components like Microsoft .NET Framework, MSXML, and C++. Outdated or damaged Windows components can interfere with QuickBooks functionality.Perform a Clean Install of QuickBooks: If the issue persists, consider performing a clean reinstall of QuickBooks. Uninstall QuickBooks from your system, rename the installation folders, reinstall QuickBooks, and then update it to the latest version.Check for Third-Party Software Conflicts: Sometimes, conflicts with third-party software such as antivirus or anti-malware programs can cause issues with QuickBooks. Temporarily disable these programs and try opening QuickBooks again to see if the error persists.Repair QuickBooks Installation: Use the Control Panel to repair your QuickBooks installation. Go to Control Panel > Programs and Features, select QuickBooks from the list, and click on Repair. Follow the on-screen instructions to complete the repair process.Seek Technical Support: If you’ve tried all the troubleshooting steps above and are still experiencing Error 3371 status code 11104, consider contacting QuickBooks technical support for further assistance. They can provide personalized guidance and help you resolve the issue. By following these troubleshooting solutions, you can effectively address QuickBooks Error 3371 status code 11104 and resume normal operation of the software without further interruption. Remember to back up your company file before making any significant changes to ensure data integrity. Read More
Is it possible to use previous answer in a new question?
Hi,
Say I have Q1 to be What is your first name?
I then want Q2 to be How did you find out about us, <Q1 Answer>?
Is this possible?
Thanks
Todd
Hi,Say I have Q1 to be What is your first name?I then want Q2 to be How did you find out about us, <Q1 Answer>?Is this possible?ThanksTodd Read More
ingest iot device data directly from tcp or udp stream?
Hi all,
Newbie question. We have some existing scada iot type devices that send basic telemetry data to a propriety database system that is very old. The tcp or udp data is unencrypted and unauthenticated, and easily decoded and read with wireshark. I’m wondering if there is something in the Azure IoT world that can be deployed to listen on a tcp port for the network stream of data, and then be configured to decode this data, and then send it off to Azure for reporting?
Thanks
Hi all, Newbie question. We have some existing scada iot type devices that send basic telemetry data to a propriety database system that is very old. The tcp or udp data is unencrypted and unauthenticated, and easily decoded and read with wireshark. I’m wondering if there is something in the Azure IoT world that can be deployed to listen on a tcp port for the network stream of data, and then be configured to decode this data, and then send it off to Azure for reporting? Thanks Read More
Train a simple Recommendation Engine using the new Azure AI Studio
Hi, everyone! I am Paschal Alaemezie, a Gold Microsoft Learn Student Ambassador. I am a student at the Federal University of Technology, Owerri (FUTO). I am interested in Artificial Intelligence, Software Engineering, and Emerging technologies, and how to apply the knowledge from these technologies in writing and building cool solutions to the challenges we face. Feel free to connect with me on LinkedIn and GitHub or follow me on X (Twitter).
In my previous article, I wrote about Recommendation Engines and gave a walkthrough on how to train a simple recommendation engine using the Azure Machine Learning Designer via the Azure portal. In this article, I will give a walkthrough on how to replicate this training using Azure Machine Learning Designer via the new Azure AI Studio.
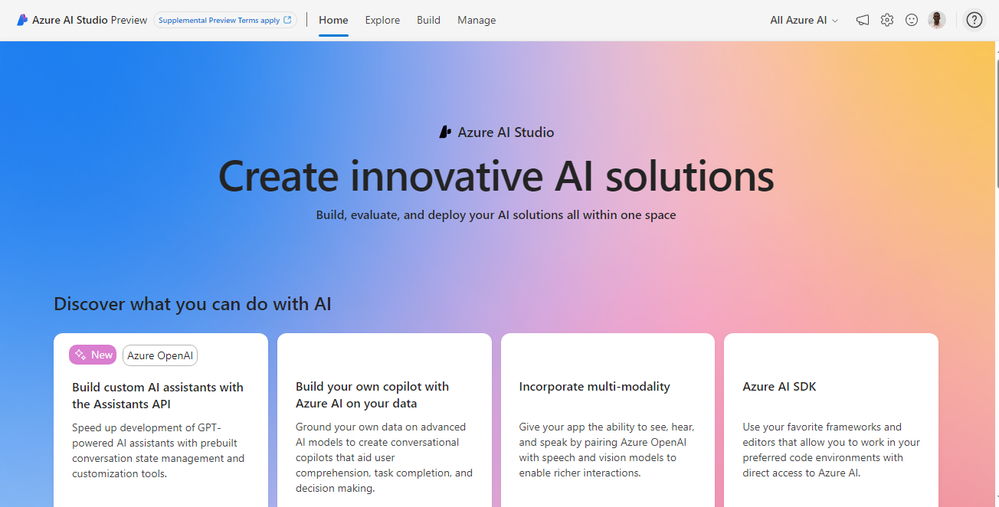
The new Azure AI Studio is a comprehensive platform designed to facilitate the development, management, and deployment of AI applications. It offers a user-friendly interface with drag-and-drop capabilities for model creation, alongside advanced features for model management and scalability. The platform supports automated machine learning to optimize model selection and tuning. It is suitable for creating custom AI solutions, including chatbots and other AI-driven applications, with a focus on collaboration, efficiency, and responsible AI practices. Azure AI Studio is available in public preview, providing a glimpse into the future of AI development tools.
An Azure subscription is required to carry out the activities in this article. If you are a student, you can use your university or school email to sign up for a free Azure for Students account and start building on the Azure cloud with a free $100 Azure credit.
Activity 1: Create a New Training Pipeline
Step 1: Setting up your Azure AI Studio workspace
Open your web browser and go to ai.azure.com to open the new Azure AI Studio
Go to Build on the Azure AI Studio and click on it to open the Build environment. Then click on + New project button to open the Create a project environment.
Step 2: Creating your project
For the Project details section:
At Hub name, key in your preferred name for your project’s hub in the input box provided.
At Subscription, select your existing subscription from the drop-down menu.
Select your Resource group. If you have any existing resource group, select it from the drop-down menu. Otherwise, click on Create new to create a new resource group, and click OK after that.
At Location, select your location from the drop-down menu. Then, click on the Next button at the bottom of the screen to go to the Review and finish.
At the Review and finish section, click on Create a project button at the bottom of the screen to provision your workspace on Azure AI Studio.
Your provisioned workspace will display the window below. Go to the All Azure AI at the upper right of the screen and select the Azure Machine Learning Studio from the drop-down menu.
In the Azure Machine Learning studio, select Designer from the navigation pane on the left-hand side. This will open the Designer environment where you can select a new pipeline if there is no existing pipeline.
In the Designer environment, select the Classic prebuilt component. Then click on the Create a new pipeline using classic prebuilt components. This will open a visual pipeline authoring editor.
Step 3: Add Sample Datasets
In the left navigation pane of the Authoring editor, click the Asset library and go to the Component section. Under Component, click on Sample data.
In the Sample data, scroll down to the Movie Ratings, and IMDB Movie Titles. Drag and drop the selected datasets onto the canvas.
Step 4: Join the two datasets on Movie ID
Close the Sample data drop-down menu. From the Data Transformation section in the left navigation, select the Join Data prebuilt module, and drag and drop the selected module onto the canvas
Connect the output of the Movie Ratings module to the first input of the Join Data module.
Connect the output of the IMDB Movie Titles module to the second input of the Join Data module.
Select the Join Data module. Click the navigation button at the upper right of the canvas to open the Join Data module window.
Select the Edit column link to open the Join key columns for the left dataset editor. Select the MovieId column in the Enter column name field and click Save.
Select the Edit column link to open the Join key columns for the right dataset editor. Select the Movie ID column in the Enter column name field and click Save. Then, close the Join Data window.
Step 5: Select Columns UserId, Movie Name, and Rating using a Python script
From the Python Language section in the left navigation, select the Execute Python Script prebuilt module. Drag and drop the selected module onto the canvas. Then, connect the Join Data output to the input of the Execute Python Script module.
Select Edit code to open the Python script editor, clear the existing code and then enter the following lines of code to select the UserId, Movie Name, and Rating columns from the joined dataset. Ensure best practice by indenting only the second and third lines of your code.
Step 6: Remove duplicate rows with the same Movie Name and UserId
From the Data Transformation section in the left navigation pane, select the Remove Duplicate Rows prebuilt module from the drop-down menu, and drag and drop the selected module onto the canvas.
Connect the first output of the Execute Python Script to the input of the Remove Duplicate Rows module.
Select the Edit column link to open the Select column editor. Click the navigation button at the upper right of the canvas to open the Remove Duplicate Rows module window.
Enter the following list of columns to be included in the output dataset: Movie Name, UserId. Then, click Save.
Step 7: Split the dataset into a training set (0.5) and a test set (0.5)
From the Data Transformation section in the left navigation select the Split Data prebuilt module and drag and drop the selected module onto the canvas, then connect the Dataset to the Split Data module.
Click the navigation button at the upper right of the canvas to open the Split Data module window. Ensure that the Fraction of rows in the first output dataset: 0.5
Step 8: Initialize Recommendation Module
From the Recommendation section in the left navigation pane, select the Train SVD Recommender prebuilt module and drag and drop the selected module onto the canvas. Then, connect the first output of the Split Data module to the input of the Train SVD Recommender module.
Click the navigation button at the upper right of the canvas to open the Train SVD Recommender module window. Set Number of factors: 200. This option specifies the number of factors to use with the recommender.
Number of recommendation algorithm iterations: 30. This number indicates how many times the algorithm should process the input data. The default value is 30.
For Learning rate: 0.001. The learning rate defines the step size for learning.
Step 9: Select Columns UserId, Movie Name from the test set
From the Data Transformation section in the left navigation pane, select the Select Columns in Dataset prebuilt module and drag and drop the selected module onto the canvas. Then, connect the Split Data second output to the input of the Select columns in Dataset module.
Click the navigation button at the upper right of the canvas to open the Select Columns in Dataset module window. Select the Edit column link to open the Select columns editor.
Enter the following list of columns to be included in the output dataset: UserId, Movie Name and Click Save.
Step 10: Configure the Score SVD Recommender
From the Recommendation section in the left navigation pane, select the Score SVD Recommender prebuilt module and drag and drop the selected module onto the canvas
Connect the output of the Train SVD Recommender module to the first input of the Score SVD Recommender module, which is the Trained SVD recommendation input.
Connect the output of the Select Columns in Dataset module to the second input of the Score SVD Recommender module, which is the Dataset to score input.
Open the Score SVD Recommender module on the canvas by clicking on the navigation button at the upper right of the canvas. Set the Recommender prediction kind: Rating Prediction. For this option, no other parameters are required.
Step 11: Setup Evaluate Recommender Module
From the Recommendation section in the left navigation pane, select the Evaluate Recommender prebuilt module and drag and drop the selected module onto the canvas.
Connect the Score SVD Recommender module to the second input of the Evaluate Recommender module, which is the Scored dataset input.
Connect the second output of the Split Data module (train set) to the first input of the Evaluate Recommender module, which is the Test dataset input.
Activity 2: Submit Training Pipeline
In the Authoring editor, ensure that you have AutoSave enabled. Then click on Configure & Submit at the upper right-hand side of your screen.
For the Set up pipeline job window: In the Basics section, click the Create new button under the Experiment name. Type your new experiment name and click the Next button at the bottom of the screen.
In the Inputs & outputs section, click the Next button at the bottom of the screen.
In the Runtime settings section: skip the Default compute. Go to the select compute type and select Compute instance from the drop-down menu. Under the Select Azure ML compute instance, click on Create Azure ML compute instance. The Create compute instance will open in another environment.
In the Create compute instance window, type in your compute name under the Compute name tab. Then, select the CPU button under the Virtual machine type.
While authoring this article, I had to select my virtual machine first to enable the Compute name tab. You may or may not encounter this issue. I selected the Standard_D2_v2 virtual machine for this training. After that, click the Review + Create button at the end of the screen, to take you back to the Runtime settings window.
Back to the Runtime settings window. At the Select Azure ML compute instance, Select the compute instance that you have created. Here, I selected the movie instance from the drop-down menu. Note that your newly created compute instance will take some time to be provisioned and appear in your drop-down menu. Go to the Advanced settings and ensure that the Continue on step failure box is checked. Then, click the Review + Submit button at the end of the screen.
At the Review + Submit section, ensure that your provided details are correct. Then, click the Submit button at the end of the screen.
Activity 3: Visualize Scoring Results
Step 1: When your pipeline is submitted and your model training is completed, at the left navigation pane, go to Jobs under Asset and click on the name of your completed pipeline.
Step 2: Visualize the Scored dataset
Go to the Score SVD Recommender module on the canvas and right-click on it. Select Preview data and click on Scored dataset.
Observe the predicted values under the column Rating.
Step 3: Visualize the Evaluation Results
Go to the Evaluate Recommender module on the canvas and right-click on it. Select Preview data and click on Metric.
Evaluate the model performance by reviewing the various evaluation metrics, such as Mean Absolute Error, Root Mean Squared Error, etc.
Next step
Congratulations, on making it this far. Stay tuned for my next blog on the amazing solutions you can build using the Azure AI Studio.
For enthusiasts and professionals alike, you can leverage these resources to stay informed and inspired as you embark on your AI journey:
Microsoft AI Discord Community is a dynamic space to discuss and share AI-related insights.
Global AI Community offers a platform to connect with peers worldwide.
Azure Samples provides practical code examples to enhance your projects.
Microsoft AI Show delivers the latest updates in AI technology.
ML for Begineers Open Source Course and Curricula
Microsoft Tech Community – Latest Blogs –Read More

“Manifest parsing has failed” while running teams message extension locally.
Hi,
I wanted to add “samplePrompts” property to my manifest json which requires manifest version v1.17. I’ve changed the schema and version from v1.16 to v1.17. Also removed “packageName” property from manifest json file as v1.17 is not supported the “packageName” property. After that, I tried to run the message extension locally however I am getting below error.
When I clicked to “Copy error details to clipboard”, it give me “packageName | Property “packageName” has not been defined and the schema does not allow additional properties.” this error and unable to add message extension app.
Please let me know how can I fix it.
Hi,I wanted to add “samplePrompts” property to my manifest json which requires manifest version v1.17. I’ve changed the schema and version from v1.16 to v1.17. Also removed “packageName” property from manifest json file as v1.17 is not supported the “packageName” property. After that, I tried to run the message extension locally however I am getting below error. When I clicked to “Copy error details to clipboard”, it give me “packageName | Property “packageName” has not been defined and the schema does not allow additional properties.” this error and unable to add message extension app. Please let me know how can I fix it. Read More
Microsoft Edge only opens PDF. Can’t default to any other program.
I have Adobe Acrobat Pro installed. For some reason, edge is the default program. I have tried to change this and have had zero success. When I select any other program but edge, it will default back to edge.
On the side, it says that an error has occurred and it defaults back to edge. Can someone please help me it’s infuriating. Never had this issue before.
I have Adobe Acrobat Pro installed. For some reason, edge is the default program. I have tried to change this and have had zero success. When I select any other program but edge, it will default back to edge. On the side, it says that an error has occurred and it defaults back to edge. Can someone please help me it’s infuriating. Never had this issue before. Read More

Recommendation – Microsoft 365 authorisation concepts – Part 2
[New Blog Post]
*PART 2!*
I have put a new article online. This article is divided into two parts.
In the second part, we take a closer look at the configuration of #AdministrativeUnits and #ExchangeOnline, as well as a possible training concept.
https://www.msb365.blog/?p=5503
#MVPbuzz #M365 #Microsoft365 #CommunityRocks #EntraID
Sharing temporary data under %appData% of MSIX app with MSI application
Dear Members,
My App is .Net Framework 4.8.1 based WPF app.
Packaged in MSIX installer to distribute as Store App.
I have a use case to share temporary file data created by WPF packaged app with other desktop application. This is temporary data which will be created while executing a feature and will be deleted after completion of feature execution.
When data is kept under %appdata%/ LocalCache, it is accessible by other desktop application.
Does this kind of sharing violates any Appx principles or rules of Store App?
Thank you.
Dear Members, My App is .Net Framework 4.8.1 based WPF app.Packaged in MSIX installer to distribute as Store App. I have a use case to share temporary file data created by WPF packaged app with other desktop application. This is temporary data which will be created while executing a feature and will be deleted after completion of feature execution. When data is kept under %appdata%/ LocalCache, it is accessible by other desktop application.Does this kind of sharing violates any Appx principles or rules of Store App? Thank you. Read More


