

Category: Microsoft
Category Archives: Microsoft
It’s a new year: Sharpen your skills
As we start the new year, we want to inspire developers to hone their skills—so we’ve gathered resources that will help you learn new skills and build upon the ones you already have. Read on to explore learning modules, Cloud Skills Challenges, documentation, and other training resources to help you acquire highly sought-after skills. Improve performance and productivity, get started with .NET 8, earn a C# certification, learn how to build modern intelligent apps, collaborate with Copilot, and more.
Cloud Skills Challenge: Blazin’ 2024 with Blazor
Kick off 2024 off with a blazing start! Check out this collection of learning materials and join this Cloud Skills Challenge to learn how to build your first Blazor web app from front to back.
Cloud Skills Challenge: New year … New C# certification
Get your C# certification in 2024. Join the C# Cloud Skills Challenge to complete curated Microsoft Learn content, get hands-on experience, and develop new skills. This challenge will help kick start your C# learning and get you closer to completing the C# certification.
Learning path: Get started with GitHub and Visual Studio Code
Use GitHub and Visual Studio Code to build and manage code. Check out this free learning path to explore GitHub, find out how to integrate GitHub into Visual Studio Code, and learn about using GitHub Copilot in VS Code.
Collection: GitHub Copilot and AI for developers
GitHub Copilot can do much more than just help you write code. It can help you understand someone else’s code, write documentation, learn a new technology, or debug a problem. This collection of resources will help you get more out of GitHub Copilot.
Collection: Build intelligent apps with AI and cloud-native technologies
Start building intelligent, cloud-native apps. Explore learning resources from Microsoft Learn. Follow step-by-step guidance, interactive content, and documentation to learn about OpenAI, Azure Kubernetes Service (AKS), and cloud-native apps.
Get started with end-to-end testing with Playwright
Discover a powerful tool to streamline testing modern web applications. Playwright is an open source, end-to-end testing framework from Microsoft. This six-part video series covers everything from installing Playwright to writing tests to debugging and running your tests.
.NET Conf 2023 recap — Celebrating community, innovation, and the launch of .NET 8
Want to catch up on highlights from .NET Conf 2023? The event featured more than 80 sessions packed with insights on building modern, cross-platform apps with .NET. Check out this selection of top sessions, and then explore other sessions from .NET Conf on demand.
Learning path: Create Power Platform solutions with AI and Copilot
Do you know how to build Power Platform solutions with AI and Copilot? This Microsoft Learn path will show you how to start creating intelligent apps for your organization.
GitHub beginners collection from GitHub Universe
Explore learning resources to get started with GitHub. Learn how to create and modify projects, start coding with GitHub Codespaces, and find out how to work with GitHub Copilot.
Develop apps that use Azure AI services
Learn how to build apps that use Azure AI services. Check out samples and tutorials for using Azure AI services with your preferred language: Python, NodeJS, .NET, or Java. Then deploy a RAG (retrieval-augmented generation) chat app.
Adopt, extend, and build Copilot experiences across the Microsoft Cloud
Learn how to adopt and build Copilot experiences across the Microsoft Cloud. Discover how Copilot will help you improve productivity, creativity, and data accessibility in your organization.
The future of collaboration and AI
Build your own AI apps and copilots for Microsoft Teams and other Microsoft 365 applications using the Teams AI Library. Teams Platform has the tools you need to create a complete end-to-end AI experience for users.
Microsoft AI Tour
The Microsoft AI Tour offers free one-day, in-person sessions that will help you discover new opportunities to increase productivity with AI and enhance your skills to deliver more value using AI and Microsoft Azure. Find an event near you.
Introducing Teams App Test Tool
The new Teams App Test Tool offers a simpler way to debug Microsoft Teams bot apps within Teams Toolkit. Read the blog for everything you need to know.
Extend Copilot for Microsoft 365
Find out how to enhance Copilot for Microsoft 365 with plugins and Graph Connectors. Watch this 5-minute recap of key announcements from Microsoft Ignite.
Extend, enrich, and customize Copilot for Microsoft 365
Plugins and Microsoft Graph connectors let you use AI to increase productivity in your organization. Explore resources to learn how to extend and customize Copilot for Microsoft 365. Connect Copilot to your apps and company data.
Learn .NET 8 with new videos for beginner
New to .NET? Check out these new .NET 8 for Beginners videos to tackle .NET one step at a time, from C# to generative AI to .NET IoT and more. Learn what .NET is, what you can build with it, and how to get started.
2024 SlashData survey promotion
Take the Developer Nation Survey. Answer questions about your favorite tools and platforms and help make an impact on the future of development.
Learning path: GitHub Copilot fundamentals — Understand the AI pair programmer
Explore the fundamentals of GitHub Copilot and see how it can increase developer productivity and innovation. Complete this Microsoft Learn path to understand how to implement GitHub Copilot in your organization.
Mastering GitHub Copilot for AI paired programming
This 6-lesson course covers everything you need to know about using GitHub Copilot as an AI paired programing resource. Check out the repo on GitHub to get started.
Paving the way for platform engineering
Do you know the power of platform engineering? Take a deep look inside platform engineering and learn how your team can leverage it for impact at scale.
Build your first custom Graph connector for Copilot for Microsoft 365
Bring external data into Copilot for Microsoft 365. Watch this quick demo of how to ingest external data sources using a custom Microsoft Graph connector. Follow these easy steps to utilize enterprise data in Copilot responses.
Azure webinar series: Boost dev productivity with GitHub Enterprise and Copilot
Generative AI is changing how companies build software. Watch this Azure webinar session on demand to learn how to boost developer productivity with AI-assisted programming using GitHub and Azure.
Accelerate your AI journey with key reference solutions
Jumpstart your AI journey with key reference solutions and start building intelligent apps on Azure with tools that bring common use cases to life. Check out the solution accelerators on GitHub.
Master platform engineering: Architecting scalable and resilient systems
Learn best practices for platform engineering so you can provide a consistent and automated experience for dev teams, helping them ship new functionality quickly, securely, and more efficiently.
Now go learn something new.
Microsoft Tech Community – Latest Blogs –Read More
Lesson Learned #471: Why Can’t I Expand the Database Table List from my Application?
In the dynamic world of database management, we encounter unique challenges that impact the efficiency and performance of our applications. A common issue observed is the inability to expand the database table list during certain operations. This article addresses a specific situation where clients launch resource-intensive queries that take time and create locks, preventing other users from expanding the table list.
For instance, we have a case where a customer, under a READ Committed transaction, is attempting to delete an index while needing to query the database for its tables and associated indexes.
What happens is a lock is generated because the second session is also in READ Committed and must wait for the first session to complete. In such scenarios, we can switch our isolation level to READ Uncommitted or use hints like ReadPast or NoLock to allow access.
However, there’s a catch: the index might still appear in the list even if it no longer exists. This highlights the importance of data partitioning in large-volume databases. Moreover, remember that when using read-only replicas, executing this query will also replicate it to the replicas.
Finally, remember the usage ONLINE=ON in these type of operations: DROP INDEX (Transact-SQL) – SQL Server | Microsoft Learn
Session #1:
begin transaction
drop INDEX Index2 on Table1
Session #2:
begin transaction
select * from sys.indexes with (readpast)
Additional Information
Lesson Learned #319: Lock request time out period exceeded using SSMS – Microsoft Community Hub
Microsoft Tech Community – Latest Blogs –Read More
January 2024 Viva Glint newsletter
Happy New Year from our Microsoft Viva Glint family!
Welcome to the January edition of our Viva Glint newsletter! This communication is full of information that will help you get the most from your Viva Glint programs.
Our next feature release
Viva Glint’s next feature release is scheduled for January 13, 2024. Your dashboard will provide date and timing details two or three days before the release.
In your Viva Glint programs
Customize a message to your survey takers – Within General Settings, enter any org-specific guidance that you’d like added to your existing privacy statement. This message will apply to all new and scheduled surveys and can be translated into additional languages. Within a specific survey, go ahead and edit that statement in Program Setup, as needed.
Customize your logo and survey email content, too! Your customization capabilities are enhanced! By following in-platform guidance, we’re empowering you to take the reins and deliver customized email communications that meet Microsoft compliance requirements. Use the Microsoft Admin Center to set a custom logo and sending domain to create customized survey emails in Viva Glint that resonate with your organization.
We are just a few weeks away from the Copilot in Viva Glint Private Preview! This innovative new tool within the Viva Glint platform is designed to help organizational leaders and HR analysts easily understand, interpret, and act on employee feedback. Say “goodbye” to the tedious task of sifting through thousands of comments – Microsoft Copilot in Viva Glint provides short, natural language summaries that accurately represent the feedback you need to see.
Changes to how you’ll set up your employee attributes – As an admin, the changes we’re rolling out will allow you to view and edit your original schema after its initial setup, incorporate user time zones, setup survey and dashboard language fields, set up personal email fields for surveying exiting employees, and we’ve updated tenure buckets, too. Read about the new attribute setup experience.
News from Viva People Science
The Microsoft Viva People Science team has been busy hosting events and authoring blogs on current tips and trends to empower you to improve your business. Check out our most recent content:
People Science Predictions: The impact of AI on the Employee Experience – Read our blog from the Viva People Science team, who has been busy making predictions about how AI is likely to impact employees and organizations. Read the 12 Predictions blog.
Connect and learn with Glint
Join us for our first Viva Glint: Ask the Experts session! Use this early registration link to join our new series to have questions answered about your Viva Glint programs.
We have platform trainings for Viva Glint admins and managers on Microsoft Learn! Use step-by-step guides to understand our dashboards, reports, and how to have quality team conversations. All Viva Glint users can benefit from our new module – Navigate and Share your Viva Glint results module located on Microsoft Learn . Use these step-by-step guides to understand our dashboards, reports, and how to have quality team conversations.
Thanks to all our Viva Glint Learning Circles first-time joiners! The Viva Glint Learning Circles program is open to all customers who want to connect with other like-minded talent professionals to share knowledge, experiences, and challenges related to employee experience. Watch for news of our next sign-up period in this monthly newsletter.
How are we doing?
Please share feedback with your Customer Experience Program Manager (CxPM) if you have one, or by emailing us here. Also, if you do not want to receive these emails in the future, please let us know and you will be removed from the distribution list. Conversely, if there are people on your teams that should be receiving this monthly update, send us those emails and we’ll be sure they are added.
Microsoft Tech Community – Latest Blogs –Read More
Lesson Learned #470: Resolving ‘EXECUTE Permission Denied’ Error on sp_send_dbmail in Azure SQL MI
We worked on a service request that our customer encountering an error message “Executed as user: user1. The EXECUTE permission was denied on the object ‘sp_send_dbmail’, database ‘msdb’, schema ‘dbo’. [SQLSTATE 42000] (Error 229). The step failed.“, I would like to share with you how was the resolution for this specific error message.
Understanding the Error
The error message explicitly points to a permission issue. The user (in this case, ‘user1’) does not have the necessary permission to execute the sp_send_dbmail stored procedure located in the msdb database. This procedure is essential for sending emails from Azure SQL Managed Instance, and lacking execute permissions will prevent the Database Mail feature from functioning correctly.
In this situation, we identified that the user1 was not part DatabaseMailUserRole role in the msdb database. Membership in this role is a prerequisite for using Database Mail.
USE msdb;
ALTER ROLE DatabaseMailUserRole ADD MEMBER [user1];
Once the permission was granted the ‘user1’ was able to successfully send emails through Database Mail in Azure SQL Managed Instance.
Microsoft Tech Community – Latest Blogs –Read More
Most widely used SharePoint Framework ISVs from the Store – December 2023
We are excited to see the continuous growth on the submissions of the SharePoint Framework (SPFx) solutions to the app source and on the usage of the SharePoint store for extending experiences for SharePoint and Microsoft Viva. Here are the top 10 most wide used ISVs based on the solution installations from the store and/or from Microsoft AppSource during December 2023.
SharePoint Framework is extensibility model for Microsoft Viva, Microsoft Teams, Outlook, Microsoft 365 app (Office) and SharePoint. It enables the same code to be used easily across the Microsoft 365 with this widely adopted tooling which uses industry standard tech with easy and automatic SSO and hosting. Usage of SPFx is growing steady and we have currently tens of millions of monthly active users in Microsoft 365 on custom extensibility build with SPFx.
Here are the latest roadmap items around SharePoint Framework and store:
Deprecation of SharePoint add-in and Azure ACS authentication models – UX powered extensibility should be transformed to us SharePoint Framework powered implementations. Add-in model was introduced back in 2012 and has not really evolved since.
Additional capabilities and features for SharePoint Framework solutions in Microsoft 365 as part of the SPFx 1.18 release.
Enabling Microsoft Viva Connections targeted solutions, powered by SharePoint Framework, in the app source and store – Will be automatically set for suitable SPFx solutions as part of the submission pipeline
Extending SharePoint Framework solutions across the Microsoft 365 with support for Microsoft Teams, Microsoft Viva, Outlook, Microsoft 365 app (Office), SharePoint and more – see the v1.16 release announcement for more details
Alignment of SharePoint Framework solution packaging model with the Microsoft Teams packages – include the best of both worlds and enable SPFx powered solutions across the Microsoft 365
Support for SharePoint Framework solutions in the Microsoft Teams store – no exact schedule, dependent on the previous bullet point
Support SharePoint Framework extensibility for list and library new, edit and view panels
Initial version was released in the 1.15 version – your input and feedback more than welcome
and more to come…
What about AI extensibility story with SPFx? – Yes. We got you covered and more to come within 2024. More details during spring 2024.
We are looking forward to more great solutions that enable innovation, and help our customers get more done with Microsoft Viva, Microsoft Teams and SharePoint.
These are the ISVs which has the most usage from the SharePoint store during last month:
Accelerator 365 by Reply
Solution details:
Solutions at app source / store
Solution provider: Accelerator 365 by Reply
Ichicraft
Solution details:
Solutions at app source / store
Solution provider: Ichicract
Bloch Engineering
Solution details:
Solutions at app source / store
Solution provider: Bloch Engineering
Sharepointalist, Inc.
Solution details:
Solutions at app source / store
Solution provider: Sharepointalist, Inc.
AQL Technologies
Solution details:
Solutions at app source / store
Solution provider: AQL Technologies
Cerkl Broadcast for SharePoint
Solution details:
Solutions at app source / store
Solution provider: Cerkl
Sysdoc
Solution details:
Solutions at app source / store
Solution provider: Sysdoc
Sintel
Solution details:
Solutions at app source / store
Solution provider: Sintel Apps
HR 365
Solution details:
Solutions at app source / store
Solution provider: HR365
SharePoint|sapiens
Solution details:
Solution at app source / store
Solution provider: SharePoint | sapiens
Resources
Please see following resources around getting started on building extensibility for Microsoft Teams, Microsoft Viva and SharePoint using SharePoint Framework.
Announcing SharePoint Framework 1.18 with updates for Microsoft Teams, Microsoft Viva and SharePoint
Announcing general availability of SharePoint Framework 1.16 – Enabling SPFx across Microsoft 365 platform
Explore and deploy SharePoint Framework solutions from partners in SharePoint (Microsoft 365)
Overview of the SharePoint Framework
Publish SharePoint Framework applications to the marketplace
Overview of Viva Connections Extensibility
Guidance for implementing partner offerings for Viva Connections with ACEs and custom APIs
Microsoft Learn – Extend Microsoft Viva Connections
SharePoint Framework samples to get started from Microsoft and community – Microsoft 365 & Power Platform Unified Sample Gallery
Happy coding! 🧡
Microsoft Tech Community – Latest Blogs –Read More

🚀 Smart load balancing for OpenAI endpoints using containers
Smart load balancing for OpenAI endpoints
Many service providers, including OpenAI, usually set limits on the number of calls that can be made. In the case of Azure OpenAI, there are token limits (TPM or tokens per minute) and limits on the number of requests per minute (RPM). When a server starts running out of resources or the service limits are exhausted, the provider may issue a 429 or TooManyRequests HTTP Status code, and also a Retry-After response header indicating how much time you should wait until you try the next request.
The solution presented here is part of comprehensive one that takes into consideration things like a good UX/workflow design, adding application resiliency and fault-handling logic, considering service limits, choosing the right model for the job, the API policies, setting up logging and monitoring among other considerations. This solution seamlessly expose a single endpoint to your applications while keeping an efficient logic to consume two or more OpenAI or any API backends based on availability and priority.
It is built using the high-performance YARP C# reverse-proxy framework from Microsoft. However, you don’t need to understand C# to use it, you can just build the provided Docker image. This is an alternative solution to the API Management OpenAI smart load balancer, with the same logic.
Note: The source code for this article is in GitHub. Watch there to receive futures updates
Why do you call this “smart” and different from round-robin load balancers?
One of the key components of handling OpenAI throttling is to be aware of the HTTP status code error 429 (Too Many Requests). There are Tokens-Per-Minute and a Requests-Per-Minute rate limiting in Azure OpenAI. Both situations will return the same error code 429.
Together with that HTTP status code 429, Azure OpenAI will also return a HTTP response header called “Retry-After”, which is the number of seconds that instance will be unavailable before it starts accepting requests again.
These errors are normally handled in the client-side by SDKs. This works great if you have a single API endpoint. However, for multiple OpenAI endpoints (used for fallback) you would need to manage the list of URLs in the client-side too, which is not ideal.
What makes this solution different than others is that it is aware of the “Retry-After” and 429 errors and intelligently sends traffic to other OpenAI backends that are not currently throttling. You can even have a priority order in your backends, so the highest priority are the ones being consumed first while they are not throttling. When throttling kicks in, it will fallback to lower priority backends while your highest ones are waiting to recover.
Another important feature: there is no time interval between attempts to call different backends. Many of other OpenAI load balancers out there configure a waiting internal (often exponential). While this is a good idea doing at the client side, making a server-side load balancer to wait is not a good practice because you hold your client and consume more server and network capacity during this waiting time. Retries on the server-side should be immediate and to a different endpoint.
Check this diagram for easier understanding:
Priorities
One thing that stands out in the above images is the concept of “priority groups”. Why do we have that? That’s because you might want to consume all your available quota in specific instances before falling back to others. For example, in this scenario:
You have a PTU (Provisioned Throughput) deployment. You want to consume all its capacity first because you are paying for this either you use it or not. You can set this instance(s) as Priority 1
Then you have extra deployments using the default S0 tier (token-based consumption model) spread in different Azure regions which you would like to fallback in case your PTU instance is fully occupied and returning errors 429. Here you don’t have a fixed pricing model like in PTU but you will consume these endpoints only during the period that PTU is not available. You can set these as Priority 2
Another scenario:
You don’t have any PTU (provisioned) deployment but you would like to have many S0 (token-based consumption model) spread in different Azure regions in case you hit throttling. Let’s assume your applications are mostly in USA.
You then deploy one instance of OpenAI in each region of USA that has OpenAI capacity. You can set these instance(s) as Priority 1
However, if all USA instances are getting throttled, you have another set of endpoints in Canada, which is closest region outside of USA. You can set these instance(s) as Priority 2
Even if Canada also gets throttling at the same at as your USA instances, you can fallback to European regions now. You can set these instance(s) as Priority 3
In the last case if all other previous endpoints are still throttling during the same time, you might even consider having OpenAI endpoints in Asia as “last resort”. Latency will be little bit higher but still acceptable. You can set these instance(s) as Priority 4
And what happens if I have multiple backends with the same priority? Let’s assume I have 3 OpenAI backends in USA with all Priority = 1 and all of them are not throttling? In this case, the algorithm will randomly pick among these 3 URLs.
Getting started
The source code provides a Dockerfile, which means you are free to build and deploy to your own service, as long as it supports container images.
[Option 1] Deploy the service directly to an Azure Container Apps
If you are not comfortable working with container images and you would like a very easy way to test this load balancer in Azure, you can deploy quickly to Azure Container Apps:
Clicking the Deploy button above, you will be taken to an Azure page with the required parameters. You need to fill the parameters beginning with “Backend_X_” (see below in Configuring the OpenAI endpoints for more information on what they do)
After the deployment is finished, go to your newly created Container Apps service and from the Overview menu, get the Application Url of your app. The format will be “https://app-[something].[region].azurecontainerapps.io“. This is the URL you will call from your client applications
[Option 2] Build and deploy as a Docker image
If you want to clone this repository and build your own image instead of using the pre-built public image:
docker build -t aoai-smart-loadbalancing:v1 .
This will use the Dockerfile which will build the source code inside the container itself (no need to have .NET build tools in your host machine) and then it will copy the build output to a new runtime image for ASP.NET 8. Just make sure your Docker version supports multi-stage builds. The final image will have around 87 MB.
[Option 3] Deploy the pre-built image from Docker hub
If you don’t want to build the container from the source code, you can pull it from the public Docker registry:
docker pull andredewes/aoai-smart-loadbalancing:v1
Configuring the OpenAI endpoints
After you deployed your container service using one of the methods above, it is time to adjust your OpenAI backends configuration using environment variables. This is the expected format you must provide:
Environment variable
Description
Example
BACKEND_X_URL
The full Azure OpenAI URL. Replace “X” with the number of your backend. For example, “BACKEND_1_URL” or “BACKEND_2_URL”
https://andre-openai.openai.azure.com
BACKEND_X_PRIORITY
The priority of your OpenAI endpoint. Lower numbers means higher priority. Replace “X” with the number of your backend. For example, “BACKEND_1_PRIORITY” or “BACKEND_2_PRIORITY”
1
BACKEND_X_APIKEY
The API key of your OpenAI endpoint. Replace “X” with the number of your backend. For example, “BACKEND_1_APIKEY” or “BACKEND_2_APIKEY”
761c427c520d40c991299c66d10c6e40
For example, let’s say you would like to configure the load balancer to have a main endpoint (we call it here BACKEND_1). We set it with the highest priority 1. And then we have two more endpoints as fallback in case the main one is throttling… we define then BACKEND_2 and BACKEND_3 with the same priority of 2:
Environment variable
Value
BACKEND_1_URL
https://andre-openai.openai.azure.com
BACKEND_1_PRIORITY
1
BACKEND_1_APIKEY
33b9996ce4644bc0893c7988bae349af
BACKEND_2_URL
https://andre-openai-2.openai.azure.com
BACKEND_2_PRIORITY
2
BACKEND_2_APIKEY
412ceac74dde451e9ac12581ca50b5c5
BACKEND_3_URL
https://andre-openai-3.openai.azure.com
BACKEND_3_PRIORITY
2
BACKEND_3_APIKEY
326ec768694d4d469eda2fe2c582ef8b
It is important to always create 3 environment variables for each new OpenAI endpoiny that you would like to use.
Testing the solution
To test if everything works by running some code of your choice, e.g., this code with OpenAI Python SDK:
client = AzureOpenAI(
azure_endpoint=“https://<your_load_balancer_url>”, #if you deployed to Azure Container Apps, it will be ‘https://app-[something].[region].azurecontainerapps.io’
api_key=“does-not-matter”, #The api-key sent by the client SDKs will be overriden by the ones configured in the backend environment variables
api_version=“2023-12-01-preview”
)
response = client.chat.completions.create(
model=“<your_openai_deployment_name>”,
messages=[
{“role”: “system”, “content”: “You are a helpful assistant.”},
{“role”: “user”, “content”: “What is the first letter of the alphabet?”}
]
)
print(response)
Scalability vs Reliability
This solution addresses both scalability and reliability concerns by allowing your total Azure OpenAI quotas to increase and providing server-side failovers transparently for your applications. However, if you are looking purely for a way to increase default quotas, I still would recommend that you follow the official guidance to request a quota increase.
Multiple load balancer instances
This solution uses the local memory to store the endpoints health state. That means each instance will have its own view of the throttling state of each OpenAI endpoint. What might happen during runtime is this:
Instance 1 receives a customer request and gets a 429 error from backend 1. It marks that backend as unavailable for X seconds and then reroute that customer request to next backend
Instance 2 receives a customer request and sends that request again to backend 1 (since its local cached list of backends didn’t have the information from instance 1 when it marked as throttled). Backend 1 will respond with error 429 again and instance 2 will also mark it as unavailable and reroutes the request to next backend
So, it might occur that internally, different instances will try route to throttled backends and will need to retry to another backend. Eventually, all instances will be in sync again at a small cost of unnecessary roundtrips to throttled endpoints. I honestly think this is a very small price to pay, but if you want to solve that you can always change the source code to use an external shared cache such as Redis, so all instances will share the same cached object.
Having this in mind, be careful when you configure your hosting container service when it comes to scalability. For instance, the default scaling rules in a Azure Container Apps is the number of concurrent HTTP requests: if it is higher than 10, it will create another container instance. This effect is undesirable for the load balancer as it will create many instances, and that’s why the Quick Deploy button in this repo changes that default behavior to only scale the container when CPU usage is higher than 50%.
Logging
The default logging features coming from YARP are not changed here, it is still applicable. For example, you should see these log lines being print in the container console (Stdout) when requests are sucesfully redirected to the backends:
info: Proxying to https://andre-openai-eastus.openai.azure.com/openai/deployments/gpt35turbo/chat/completions?api-version=2023-07-01-preview HTTP/2 RequestVersionOrLower
info: Yarp.ReverseProxy.Forwarder.HttpForwarder[56]
info: Received HTTP/2.0 response 200.
info: Yarp.ReverseProxy.Forwarder.HttpForwarder[9]
info: Proxying to https://andre-openai-eastus.openai.azure.com/openai/deployments/gpt35turbo/chat/completions?api-version=2023-07-01-preview HTTP/2 RequestVersionOrLower
info: Yarp.ReverseProxy.Forwarder.HttpForwarder[56]
info: Received HTTP/2.0 response 200.
Now, these are example of logs generated when the load balancer receives a 429 error from the OpenAI backend:
info: Received HTTP/2.0 response 429.
warn: Yarp.ReverseProxy.Health.DestinationHealthUpdater[19]
warn: Destination `BACKEND_4` marked as ‘Unhealthy` by the passive health check is scheduled for a reactivation in `00:00:07`.
Notice that it reads the value coming in the “Retry-After” header from OpenAI response and marks that backend as Unhealthy and it also prints how much time it will take to be reactivated. In this case, 7 seconds.
And this is the log line that appears after that time is elapsed:
info: Passive health state of the destination `BACKEND_4` is reset to ‘Unknown`.
It is OK that it says the status is reset to “Unknown”. That means that backend will be actively receiving HTTP requests and its internal state will be updated to Healthy if it receives a 200 response from the OpenAI backend next time. This is called Passive health check and is a YARP feature.
FAQ
What happens if all backends are throttling at the same time?
In that case, the load balancer will route a random backend in the list. Since that endpoint is throttling, it will return the same 429 error as the OpenAI backend. That’s why it is still important for your client application/SDKs to have a logic to handle retries, even though it should be much less frequent.
Reading the C# logic is hard for me. Can you describe it in plain english?
Sure. That’s how it works when the load balancer gets a new incoming request:
From the list of backends defined in the environment variables, it will pick one backend using this logic:
Selects the highest priority (lower number) that is not currently throttling. If it finds more than one healthy backend with the same priority, it will randomly select one of them
Sends the request to the chosen backend URL
If the backend responds with success (HTTP status code 200), the response is passed to the client and the flow ends here
If the backend responds with error 429 or 5xx
It will read the HTTP response header “Retry-After” to see when it will become available again
Then, it marks that specific backend URL as throttling and also saves what time it will be healthy again
If there are still other available backends in the pool, it runs again the logic to select another backend (go to the point 1. again and so on)
If there are no backends available (all are throttling), it will send the customer request to the first backend defined in the list and return its response
Related articles
The same load balancer logic but using Azure API Management: Smart Load-Balancing for Azure OpenAI with Azure API Management
Microsoft Tech Community – Latest Blogs –Read More
Intune iOS/iPadOS Management In a Nutshell
Hi, Jonas here!
Or as we say in the north of Germany: “Moin Moin!”
I’m a Microsoft Cloud Solution Architect and this blog post should give a brief overview of how to manage iOS and iPadOS devices with Microsoft Intune and how to get started.
If you are planning to migrate to Intune, I highly recommend the following link to a migration guide some colleagues wrote: https://aka.ms/intunemigrationguide
Device Enrollment
Enrollment is the process of registering a device with Intune and applying the necessary policies and settings to manage it. There are different methods of enrolling iOS and iPadOS devices, depending on the ownership and use case of the device.
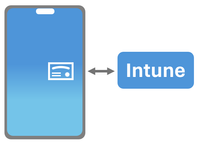
Device enrolled and managed by Intune. Certificate for trust relationship
Automated Device Enrollment (ADE) via Apple Business Manager (ABM): This method allows you to enroll devices that are purchased through ABM, which is a web-based portal that lets you manage your Apple devices and content. You can link your ABM account to Intune, and automatically enroll devices when they are turned on for the first time. You can also assign devices to different Entra ID groups, and apply different policies and profiles to them. ADE gives you more control over the devices, and can prevent users from removing the management profile and ultimately the device from Intune management.
NOTE: This feature was formerly known as Device Enrollment Program (DEP)
NOTE: Existing devices can be added via Apple Configurator for iPhone app to ABM
Apple Configurator: This method allows you to enroll devices that are not enrolled through ADE. You can use a Mac computer with the Apple Configurator app to prepare and enroll devices in bulk.
User-initiated enrollment: This method allows users to enroll their devices by themselves, either through the Company Portal app or the Safari browser. You can configure the enrollment settings and requirements for user-initiated enrollment in the Intune portal. (The so called: Bring-Your-Own-Device (BYOD) process)
NOTE: Apple device enrollment requires the use of the Apple Push Notification service (APNs). To be able to communicate securely with APNs Intune requires an Apple MDM push certificate or APNs certificate.
Read more about the certificate HERE and HERE.
Each enrollment method and its features are described in more detail in the official Intune documentation HERE
Use the visual guide (PDF or Visio download) on the top of the page to get a better understanding of each method.
A typical Intune device lifecycle would include the following actions:
Intune device lifecycle diagram
Enrollment Notifications for BYOD scenarios
Enrollment notifications are messages that are sent to the device user in the form of a push message to the Company Portal app or via email to the users mailbox.
They can be used in user initiated enrollments and can help to educate the users on the benefits of enrolling their devices, such as accessing the organization’s resources, protecting their data, and managing their devices remotely.
And if the user has not initiated the enrollment process themselves, thy can take action and inform the IT staff about it. (Not possible for automated enrollments at the time of writing)
Enrollment notifications on mobile device
Mobile Application Management (MAM)
While in the past the term “Intune MAM” was mostly used for securing apps on unenrolled devices (devices not managed by Intune or managed by a 3rd party MDM solution), now Intune mobile application management refers to the suite of Intune management features that lets you publish, push, configure, secure, monitor, and update mobile apps for your users.
Some of the features are:
App assignment: This is the method of assigning the apps to users or devices, based on the app type and the deployment intent. You can use app assignment to specify whether the app is required, available, or to be uninstalled for users or devices. The Filter feature of Intune can help further filter the number of users or devices for assignments without the need to change Entra ID (formerly known as Azure AD) group memberships. (Entra ID groups are the basis for any assignment in Intune)
App protection policies: These are policies that apply to the app data, regardless of the device enrollment status. You can use app protection policies to protect corporate data in apps, such as requiring a PIN to open an app, encrypting app related data, or preventing app data transfer to other apps and locations. (This feature works in conjunction with the “Dual Identity” feature of the Intune app sdk)
(App protection policies also work for unenrolled devices / MAM for unenrolled devices)
App configuration policies: These are policies that apply to the app settings, such as the server URL, the username, or the app mode. You can use app configuration policies to pre-configure apps for users and reduce the need for manual input.
Such polices can also be targeted to apps running on devices without being enrolled in Intune. There are two types of app configuration policies, policies for managed devices (fully enrolled in Intune) and policies just for managed apps (running on devices enrolled or not / MAM for unenrolled devices)
Simplified view of the dual identity feature of the Intune app SDK with or without enrollment
App inventory: Refers to the list of apps that are installed, along with the app details and status. Inventory data depends on the ownership state. For a personal device only managed app data can be retrieved, while a corporate owned device can inventory all data.
A typical Intune app lifecycle would include the following actions:
Intune app lifecycle diagram
Device configuration policies
As mentioned in the MAM section, device configuration policies are policies that define the settings and features that you want to enable or disable on the enrolled devices, such as Wi-Fi, VPN, email or browser settings for example. You can use device configuration policies to customize the user experience and the functionality of the devices, and to apply the best practices for device management. You can create and assign device configuration policies in Intune Admin Center and monitor their status and impact.
NOTE: The possible configuration settings depend on the device enrollment type, either automated enrollment or user-initiated enrollment.
Compliance Policies
Compliance policies are policies that define the minimum security requirements for enrolled devices, such as the password complexity, device encryption state, or minimum OS version. You can use compliance policies to ensure that the devices meet the security standards of your organization, and to take actions on non-compliant devices, such as notifying end users, blocking access to corporate resources, or wiping the device. You can configure compliance policies in the Intune portal and assign them to the users or the devices.
Other than device configuration policies compliance policies typically just “report” a state rather than changing (configure) a state. (See note down below this section for exceptions).
There are two types of compliance settings in Intune:
Compliance policy settings: Intune tenant wide compliance settings that every device receives. Basically the default compliance baseline.
Device compliance policies: A set of security settings which can be assigned to individual device groups.
A device compliance policy not only contains checks for a compliant state, but also actions for noncompliance like the following:
Mark device noncompliant
Send email or push notification to end user with instructions to remediate a noncompliant state (Notification language is defined by language settings of https://myaccount.microsoft.com per user)
Remotely lock the noncompliant device
Add device to retire list. An Intune admin can then take action on those devices.
NOTE: If a device compliance policy requires a password to unlock mobile devices, a password is automatically enforced regardless of the specific password settings of the policy.
Meaning, there will not only be a check if a password is used to unlock the device, but it will also be enforced.
Conditional Access Policies
Conditional access policies let you define the conditions under which users can access specific applications (like Sharepoint, OneDrive or Teams), such as requiring multi-factor authentication, device compliance, or location-based rules. You can also use conditional access to block access for certain users, devices, or locations that do not meet your security standards.
Conditional access policies are applied after a user signs in to an application, but before they are granted access. The policies are enforced by Entra ID (formerly known as Azure AD), which evaluates the user’s identity, device, and network information against the conditions and requirements of the policy.
The user is either allowed to access an application, blocked or prompted to perform additional actions, such as verifying their identity with a second factor.
While Conditional Access (CA) is an Entra ID feature it is integrated into Intune and shown in the Intune Admin Center. (Additional permissions are required to configure CA)
A conditional access policy can grant access based on the following Intune related conditions:
(There are more conditions available, these are just the ones coming from Intune)
Require devices to be marked as compliant.
The state is based on Intune Device Compliance Policy
Require approved client app
List of defined apps installed on a device, e.g. for unenrolled devices
Require app protection policy
App protection policy must be assigned from Intune, e.g. for unenrolled devices
Simplified diagram of Conditional Access with conditions and controls
Microsoft Tunnel
Microsoft Tunnel is a VPN gateway solution for Microsoft Intune that runs in a container on Linux and allows access to on-premises resources from iOS/iPadOS and Android Enterprise devices using modern authentication and Conditional Access.
Microsoft Tunnel can also be used for applications running on devices not enrolled in Intune. (MAM without device enrollment) This feature can be added to Microsoft Tunnel after deployment and is called: “Microsoft Tunnel for Mobile Application Management”.
Via Intune app configuration policies Microsoft Tunnel can be configured to only apply for some apps for some resources (app based VPN). Meaning, a defined list of apps can use Microsoft Tunnel for specific resources located in your on-premises network.
Read more about Microsoft Tunnel HERE
Simplified diagram of Microsoft Tunnel setup
While Microsoft Tunnel can tunnel any traffic, Microsoft Entra application proxy might be enough for http/https-based traffic.
Microsoft Entra application proxy consists of a proxy connector installed on-premises with access to an on-premises web application and the application proxy service running in Azure.
Users can access your on-premises applications the same way they access Microsoft 365 and other SaaS apps integrated with Microsoft Entra ID.
Read more about Microsoft Entra application proxy HERE
Microsoft Defender for Endpoint on iOS
Microsoft Defender for Endpoint on iOS is a product of its own. It is an excellent addition to the other mentioned Intune related security features like app protection policies, device compliance polices, conditional access or Microsoft Tunnel.
Read more about the feature HERE
How to start with Intune iOS/iPadOS management
This document should give you some key information as a starting point, but the easiest way to start with Intune iOS/iPadOS management is to follow the iOS/iPadOS deployment guide HERE
If you are planning to migrate to Intune, I highly recommend the following link to a migration guide some colleagues wrote: https://aka.ms/intunemigrationguide
Additional notes
This section contains some notes that might help with the initial setup of Intune iOS/iPadOS management.
APNs certificate
Familiarize yourself with the APNs certificate management tasks and recommendations from the Intune support team described HERE.
Apple Business Manager (ABM)
Different ABM accounts used for app synchronization can result in multiple application entries for one app.
It might be helpful to either use one ABM account to synchronize all required applications, or assign a scope tag to the location token in Intune.
Scope tags are used for role based access, but in the example above, they can help to later identify which app was synchronized with what ABM location token.
App protection policies for different device types
If one user needs to have different app protection policies for different device types (enrolled or unenrolled), apps on enrolled devices need to have an app configuration policy with the IntuneMAMUPN value set.
Read more about it HERE
I hope you enjoyed reading this blog post. Stay safe!
Jonas Ohmsen
Microsoft Tech Community – Latest Blogs –Read More

How Augury’s AI-powered IoT monitoring solution in Azure Marketplace can deliver 3x-10x ROI
In this guest blog post, Sara Aldworth, Content Marketing Manager for Augury, discusses the benefits of manufacturing IoT monitoring. For more than 20 years, Sara has worked with tech start-ups and established SaaS companies, communicating the positive impact of their business solutions. Her most recent work has focused on the intersection of AI and IoT and its power to improve the health of humans and the health of machines in heavy industry.
Manufacturers added $2.9 trillion of value to the U.S. economy in 2023. With that much money at stake, manufacturers must keep their production high and their downtime low. Monitoring the real-time health of their rotating machines is necessary to ensure the consistent, reliable delivery of products promised to customers.
Benefits of AI-powered IoT machine health monitoring
Thanks to the internet of things (IoT) and artificial intelligence (AI), maintenance teams can leverage predictive, prescriptive condition-based monitoring to get ahead of machine failure. Benefits include, but are not limited to, cost savings by:
preventing unexpected breakdowns and allowing teams to plan their downtime for minimal impact on the business;
optimizing asset care to extend the lifespan of expensive machinery and reduce the need for costly repairs/replacements;
maximizing yield and capacity by fine-tuning processes and improving overall performance;
and reducing waste, loss, and emissions by improving energy usage to meet sustainability goals.
Success at achieving such benefits can be found through AI-driven machine health solutions. Microsoft partner Augury’s Machine Health on Azure Marketplace is one such example, and has been adopted by some of the most innovative companies in the world:
A leading global chemical manufacturer realized 7x ROI after implementing Augury at several pilot sites, with significant wins in preventing unplanned downtime and driving increased productivity.
Similarly, an industry leader in the U.S. pet food manufacturing vertical averted 700+ hours of downtime using Augury Machine Health to monitor their equipment and achieved an estimated $1M+ in cost savings.
Gaining 3x-10x ROI through data-driven decisions
Maintenance and reliability teams use Augury Machine Health to glean real-time insights into machine performance and to make data-driven decisions on caring for their equipment. Augury Machine Health combines advanced IoT sensors, AI expertise, and change management resources to create tangible business results, with most customers seeing 3x-10x ROI in a matter of months.
Augury’s AI has 99.9%+ diagnostic accuracy and has been trained on more than 450 million recorded machine hours, with a vast and growing database of unique machine signatures across over 65 distinct machine types.
Additionally, Augury’s team of Cat III & IV vibration analysts are on standby to assist maintenance and reliability teams as they create actionable plans to restore their equipment to optimal health.
How to gain additional benefits through Azure Marketplace
In early 2022, Augury migrated its cloud services to Microsoft Azure. Azure provides storage for Augury and enables our AI and machine learning algorithms to analyze the data collected from our customers. Augury has worked hand-in-hand with Microsoft sellers to transact multiple deals through the Azure Marketplace.
Subscribing to the Augury solution through Azure Marketplace has multiple benefits for customers. Those who have completed multimillion-dollar transactions with Augury through the marketplace experienced:
Microsoft Azure Consumption Commitment (MACC) contract decrement;
consolidation of multiple purchase orders (POs);
access to other budgets allocated for Microsoft;
streamlined procurement;
and security and governance through Azure.
Take for example one customer, who had been trying to finalize its MACC contract for months. By purchasing Augury’s Machine Health through the marketplace, the customer was able to:
increase and meet their required Azure usage goals;
sign a larger MACC contract to receive more benefits and funding from Microsoft;
and decrement their MACC contract instantaneously with the Augury purchase.
Given the large number of manufacturers who leverage Azure for their internal services, the partnership between Microsoft and Augury creates great synergies for customers, starting with the simple, seamless purchasing process.
To learn more about Augury or request a demo, visit augury.com.
Microsoft Tech Community – Latest Blogs –Read More

Easily Manage Privileged Role Assignments in Microsoft Entra ID Using Audit Logs
One of the best practices for securing your organization’s data is to follow the principle of least privilege, which means granting users the minimum level of permissions they need to perform their tasks. Microsoft Entra ID helps you apply this principle by offering a wide range of built-in roles as well as allowing you to create custom roles and assign them to users or groups based on their responsibilities and access needs. You can also use Entra ID to review and revoke any role assignments that are no longer needed or appropriate.
It can be easy to lose track of role assignments if admin activities are not carefully audited and monitored. Routine checks of role assignments and generating alerts on new role assignments are one way to track and manage privileged role assignment.
Chances are that when a user with privileged roles is approached, they’ll say they need the role. This may be true; however, many times users will unknowingly say they need those permissions to carry out certain tasks when they could be assigned a role with lower permissions. For example, a user will be able to reset user passwords as a Global Administrator, but that does not mean they can’t do that with another role with far less permissions.
Defining privileged permissions
Privileged permissions in Entra ID can be defined as “permissions that can be used to delegate management of directory resources to other users, modify credentials, authentication or authorization policies, or access restricted data.” Entra ID roles each have a list of permissions defined to them. When an identity is granted the role, the identity also inherits the permissions defined in the role.
It’s important to check the permissions of these roles. The permissions defined in all built-in roles can be found here. For example, there are a few permissions that are different for the Privileged Authentication Administrator role than the Authentication Administrator role, giving the former more permissions in Entra ID. The differences between the authentication roles can be viewed here.
Another example of having differences between similar roles is for the end user administration roles. The differences and nuances between these roles are outlined in detail here.
Auditing activity
To decide if a user really needs a role, it’s crucial to monitor their activities and find the role with the least privilege that allows them to carry out their work. You’ll need Entra ID audit logs for this. Entra ID audit logs can either be sent to a Log Analytics Workspace or connected to a Sentinel instance.
There are two methods that can be used to get the events of carried out by admin accounts. The first will make use of the IdentityInfo table, which is only available in Sentinel after enabling User and Entity Behavior Analytics (UEBA). If you aren’t using UEBA in Sentinel or if you’re querying a Log Analytics Workspace, then you’ll need to use the second method in the next heading.
Using Microsoft Sentinel
To ingest Entra ID audit logs into Microsoft Sentinel, the Microsoft Entra ID data connector must be enabled, and the Audit Logs must be ticked as seen below.
Figure 1 Entra ID data connector in Sentinel with Audit logs enabled
The IdentityInfo table stores user information gathered by UEBA. Therefore, it also includes the Entra ID roles a user has been assigned. This makes it very simple to get a list of accounts that have been assigned privileged roles.
The query below will give a unique list of activities an account has taken, as well as which roles the account has been assigned:
AuditLogs
| where TimeGenerated > ago(90d)
| extend ActorName = iif(
isnotempty(tostring(InitiatedBy[“user”])),
tostring(InitiatedBy[“user”][“userPrincipalName”]),
tostring(InitiatedBy[“app”][“displayName”])
)
| extend ActorID = iif(
isnotempty(tostring(InitiatedBy[“user”])),
tostring(InitiatedBy[“user”][“id”]),
tostring(InitiatedBy[“app”][“id”])
)
| where isnotempty(ActorName)
| join (IdentityInfo
| where TimeGenerated > ago(7d)
| where strlen(tostring(AssignedRoles)) > 2
| summarize arg_max(TimeGenerated, *) by AccountUPN
| project AccountObjectId, AssignedRoles)
on $left.ActorID == $right.AccountObjectId
| summarize Operations = make_set(OperationName) by ActorName, ActorID, Identity, tostring(AssignedRoles)
| extend OperationsCount = array_length(Operations)
| project ActorName, AssignedRoles, Operations, OperationsCount, ActorID, Identity
| sort by OperationsCount desc
This will give results for all accounts that carried out tasks in Entra ID and may generate too many operations that were not privileged. To filter for specific Entra ID roles, the following query can be run where the roles are defined in a list. Three roles have been added as examples, but this list can and should be expanded to include more roles:
let PrivilegedRoles = dynamic([“Global Administrator”,
“Security Administrator”,
“Compliance Administrator”
]);
AuditLogs
| where TimeGenerated > ago(90d)
| extend ActorName = iif(
isnotempty(tostring(InitiatedBy[“user”])),
tostring(InitiatedBy[“user”][“userPrincipalName”]),
tostring(InitiatedBy[“app”][“displayName”])
)
| extend ActorID = iif(
isnotempty(tostring(InitiatedBy[“user”])),
tostring(InitiatedBy[“user”][“id”]),
tostring(InitiatedBy[“app”][“id”])
)
| where isnotempty(ActorName)
| join (IdentityInfo
| where TimeGenerated > ago(7d)
| where strlen(tostring(AssignedRoles)) > 2
| summarize arg_max(TimeGenerated, *) by AccountUPN
| project AccountObjectId, AssignedRoles)
on $left.ActorID == $right.AccountObjectId
| where AssignedRoles has_any (PrivilegedRoles)
| summarize Operations = make_set(OperationName) by ActorName, ActorID, Identity, tostring(AssignedRoles)
| extend OperationsCount = array_length(Operations)
| project ActorName, AssignedRoles, Operations, OperationsCount, ActorID, Identity
| sort by OperationsCount desc
Once the query is run, the results will give insights into the activities performed in your Entra ID tenant and what roles those accounts have. In the example below, the top two results don’t pose any problems. However, the third row contains a user that has the Global Administrator role and has created a service principal. The permissions needed to create a service principal can be found in roles less privileged than the Global Administrator role. Therefore, this user can be given a less privileged role. To find out which role can be granted, check this list, which contains the least privileged role required to carry out specific tasks in Entra ID.
Figure 2 Actions taken by users in Entra ID
Using Log Analytics Workspace
Figure 3 Configuring the forwarding of Entra ID Audit logs to a Log Analytics Workspace
To ingest Entra ID audit logs into a Log Analytics Workspace follow these steps.
Because there is no table that contains the roles an identity has been granted, you’ll need to add the list of users to the query and filter them. There are multiple ways to get a list of users who have been assigned a specific Entra ID role. A quick way to do this is to go to Entra ID and then select Roles and administrators. From there, select the role and export the identities that have been assigned to it. It’s important to have the User Principal Names (UPNs) of the privileged users. You’ll need to add these UPNs, along with the roles the user has, to the query. Some examples have been given in the query itself. If the user has more than one role, then all roles must be added to the query.
datatable(UserPrincipalName:string, Roles:dynamic) [
“admin@contoso.com”, dynamic([“Global Administrator”]),
“admin2@contoso.com”, dynamic([“Global Administrator”, “Security Administrator”]),
“admin3@contoso.com”, dynamic([“Compliance Administrator”])
]
| join (AuditLogs
| where TimeGenerated > ago(90d)
| extend ActorName = iif(
isnotempty(tostring(InitiatedBy[“user”])),
tostring(InitiatedBy[“user”][“userPrincipalName”]),
tostring(InitiatedBy[“app”][“displayName”])
)
| extend ActorID = iif(
isnotempty(tostring(InitiatedBy[“user”])),
tostring(InitiatedBy[“user”][“id”]),
tostring(InitiatedBy[“app”][“id”])
)
| where isnotempty(ActorName) ) on $left.UserPrincipalName == $right.ActorName
| summarize Operations = make_set(OperationName) by ActorName, ActorID, tostring(Roles)
| extend OperationsCount = array_length(Operations)
| project ActorName, Operations, OperationsCount, Roles, ActorID
| sort by OperationsCount desc
Once you run the query, the results will give insights into the activities performed in your Entra ID tenant by the users you have filtered for. In the example below, the top two results can cause problems. Both have the Global Administrator role, but their operations don’t necessitate to have that role. The permissions needed for these operations can be found in roles less privileged than the Global Administrator role. Therefore, these users can be given a less privileged role. To find out which role can be granted, check this list, which contains the least privileged role required to carry out specific tasks in Entra ID.
Figure 4 Actions taken by users in Entra ID
If this user still requires the Global Administrator role then the Security Administrator role will become redundant as the Global Administrator contains more permissions than the Security Administrator role.
Conclusion
Keeping accounts with privileges that are not required is keeping your attack surface greater than it needs to be. By ingesting Entra ID Audit logs, you can query and identify users who have unnecessary and over-privileged roles. You can then find a suitable alternative role for them.
Timur Engin
Learn more about Microsoft Entra:
See recent Microsoft Entra blogs
Dive into Microsoft Entra technical documentation
Learn more at Azure Active Directory (Azure AD) rename to Microsoft Entra ID
Join the conversation on the Microsoft Entra discussion space and Twitter
Learn more about Microsoft Security
Microsoft Tech Community – Latest Blogs –Read More

Logic Apps Aviators Newsletter – January 2024
In this issue:
Ace Aviator of the Month
Customer Corner
News from our product group
News from our community
Ace Aviator of the Month
January’s Ace Aviator: Mark Brimble
What is your role and title? What are your responsibilities associated with your position?
My job title is integration architect at Bidone. I was responsible for moving their EDI solutions from BizTalk Server to Azure. That is now done. I am now elaborating the long-term strategy for Bidone EDI cloud architecture.
Can you provide some insights into your day-to-day activities and what a typical day in your role looks like?
My day at Bidone changes, it can include assessing requests for new EDI interfaces, reviewing existing architecture against latest Azure functionality, Azure cost assessment, reviewing our Azure security, implementing interfaces and third level Azure support.
What motivates and inspires you to be an active member of the Aviators/Microsoft community?
I have always written about what I do for 3 reasons. Firstly it clears my mind of stressful situations, it is a record of where I have been and what I write might help some else.
Looking back, what advice do you wish you would have been told earlier on that you would give to individuals looking to become involved in STEM/technology?
My advice to a younger self would be join or start a startup. Take some risks because you will learn from any failures.
What has helped you grow professionally?
I think presenting is a good way to learn because I always think that you don’t understand anything until you have to teach some else about it.
Imagine you had a magic wand that could create a feature in Logic Apps. What would this feature be and why?
I would have a universal mapping tool that creates XSLT and liquid templates. (I know you are halfway there but would like it for consumption too).
Customer Corner:
Check out this customer success story about Microsoft helping KPMG Netherlands increase operation speed and create opportunity for future enhancements. With the use of Azure API Management and Logic Apps, KPMG Netherlands reduced integration time from days to nearly instantaneous. Read more in this article about how Azure Integration Services benefit KPMG Netherlands, leading to plans for expansion to other branches.
News from our product group:
Use Logic Apps to build intelligent OpenAI applications
Read more about leveraging Logic Apps and OpenAI to develop intelligent workflows and applications.
Azure Integration Services year in review: An exciting innovative 2023!
Hello 2024 – catch up and review Azure Integration Services’ remarkable year.
Business Process Tracking – Frequently Asked Questions (microsoft.com)
Have any questions about the Business Process Tracking Public Preview? Check out this video with answers for some questions from the community.
Utilize legacy Web Service code in Logic App Standard
In this article, read about how to automatically create local function app classes that can be called by Logic Apps.
Passing Complex Objects to .NET Framework Custom Code in Azure Logic Apps (Standard)
Read more on how to pass a complex object to Custom Code in this post by Kent.
Author API Management policies using Microsoft Copilot for Azure
Microsoft Copilot for Azure introduces policy authoring capabilities for Azure API Management. Read more on how to leverage AI assistance to seamlessly author, maintain, and understand API Management policies.
BizTalk Server 2020 Cumulative Update 5
Read up on the CU5 for BizTalk Server 2020, now available for download.
Optimizing Service Bus message processing concurrency using Logic apps Stateless flow.
In this article, read how to utilize host configuration for Service Bus trigger in Logic App Standard.
Https Trace Tool For Logic Apps Standard
Learn more about enhancing Logic Apps Debugging with the HttpTraceForLogicApps tool.
News from our community:
Post by Massimo Crippa
In this article by Massimo, learn how to approach the APIM migration in a practical sample use case.
Azure Logic Apps: securing HTTP Triggers with Microsoft Entra ID authentication
Post by Stefano Demiliani
Read more on how to ensure safer data processing and access control for Azure Logic Apps’ HTTP triggers by implementing Microsoft Entra ID authentication.
Should I use a Function App or Inline Functions?
Post by Mike Stephenson
In this video, Mike answers the question of Function App or Inline Functions with the new release of inline .NET functions for Logic App Standard.
Azure Function to Apply XSLT Transformations
Post by Sandro Pereira
In this article, read up on how to use the ApplyXSLTTransformation function by setting up an Azure Storage Account and a container to store the XSLT files.
A Quick Introduction to Azure SQL Trigger for Functions
Post by Sri Gunnala
Watch this quick introduction and step-by-step walk-through of setting up and configuring SQL Trigger Azure Functions.
Azure API Management | Logic App (Standard) Backend
Post by Andrew Wilson
Learn in this post by Andrew a configurable and secure method to setup front-to-backend routing for a Logic App (Standard) workflow as an API in API Management.
Microsoft Tech Community – Latest Blogs –Read More
Lesson Learned #470: Resolving ‘EXECUTE Permission Denied’ Error on sp_send_dbmail in Azure SQL MI
We worked on a service request that our customer encountering an error message “Executed as user: user1. The EXECUTE permission was denied on the object ‘sp_send_dbmail’, database ‘msdb’, schema ‘dbo’. [SQLSTATE 42000] (Error 229). The step failed.“, I would like to share with you how was the resolution for this specific error message.
Understanding the Error
The error message explicitly points to a permission issue. The user (in this case, ‘user1’) does not have the necessary permission to execute the sp_send_dbmail stored procedure located in the msdb database. This procedure is essential for sending emails from Azure SQL Managed Instance, and lacking execute permissions will prevent the Database Mail feature from functioning correctly.
In this situation, we identified that the user1 was not part DatabaseMailUserRole role in the msdb database. Membership in this role is a prerequisite for using Database Mail.
USE msdb;
ALTER ROLE DatabaseMailUserRole ADD MEMBER [user1];
Once the permission was granted the ‘user1’ was able to successfully send emails through Database Mail in Azure SQL Managed Instance.
Microsoft Tech Community – Latest Blogs –Read More
Lesson Learned #469:Implementing a Linked Server Alternative with Azure SQL Database and C#
In scenarios where direct Linked Server connections are not feasible, such as between Azure SQL Database and an on-premise SQL Server, developers often seek alternative solutions. This blog post introduces a C# implementation that simulates the functionality of a Linked Server for data transfer between Azure SQL Database and SQL Server, providing a flexible and efficient way to exchange data.
Overview of the Solution
The proposed solution involves a C# class, ClsRead, designed to manage the data transfer process. The class connects to both the source (SQL Server) and the target (Azure SQL Database), retrieves data from the source, and inserts it into the target database.
Key Features
Connection Management: ClsRead maintains separate connection strings for the source and target databases, allowing for flexible connections to different SQL Server and Azure SQL Database instances.
Data Transfer Control: The class includes methods to execute a SQL query on the source database, retrieve the results into a DataTable, and then use SqlBulkCopy to efficiently insert the data into the target Azure SQL Database.
Error Handling: Robust error handling is implemented within each method, ensuring that any issues during the connection, data retrieval, or insertion processes are appropriately logged and can be managed or escalated.
Implementation Details
Class Properties
SourceConnectionString: Connection string to the source SQL Server.
TargetConnectionString: Connection string to the target Azure SQL Database.
SQLToExecuteFromSource: SQL query to be executed on the source database.
TargetTable: Name of the target table in Azure SQL Database where data will be inserted.
Methods
TransferData(): Coordinates the data transfer process, including validation of property values.
GetDataFromSource(): Executes the SQL query on the source database and retrieves the results.
InsertDataIntoAzureSql(DataTable TempData): Inserts the data into the target Azure SQL Database using SqlBulkCopy.
Error Handling
The methods include try..catch blocks to handle any exceptions, ensuring that errors are logged, and the process can be halted or adjusted as needed.
Usage Scenario
A typical use case involves setting up the ClsRead class with appropriate connection strings, specifying the SQL query and the target table, and then invoking TransferData(). This process can be used to synchronize data between different databases, migrate data, or consolidate data for reporting purposes.
For example, we have in our on-premise server the table PerformanceVarcharNVarchar that we need only the top 2000 rows and we need to compare with the table PerformanceVarcharNVarchar in our Azure SQL Database.
The first thing that we are going to perform is to create the temporal table, of course, we could create a normal table.
DROP TABLE IF EXISTS [##__MyTable__]
CREATE Table [##__MyTable__] (ID INT Primary Key)
Once we have created the table we are going to call our ClsRead with the following parameters:
static void Main(string[] args)
{
ClsRead oClsRead = new ClsRead();
oClsRead.SourceConnectionString = “Server=OnPremiseServer;User Id=userName;Password=Pwd1!;Initial Catalog=DbSource;Connection Timeout=30;Pooling=true;Max Pool size=100;Min Pool Size=1;ConnectRetryCount=3;ConnectRetryInterval=10;Application Name=ConnTest”;
oClsRead.TargetConnectionString = “Server=tcp:servername.database.windows.net,1433;User Id=username1;Password=pwd2;Initial Catalog=DBName;Persist Security Info=False;MultipleActiveResultSets=False;Encrypt=True;TrustServerCertificate=False;Connection Timeout=30;Pooling=true;Max Pool size=100;Min Pool Size=1;ConnectRetryCount=3;ConnectRetryInterval=10;Application Name=ConnTest”;
oClsRead.SQLToExecuteFromSource = “Select TOP 2000 ID from dbo.PerformanceVarcharNVarchar”;
oClsRead.TargetTable = “[##__MyTable__]”;
oClsRead.TransferData();
}
If everything has been executed correctly, we could execute, queries like this one:
select * from [##__MyTable__] A
INNER JOIN PerformanceVarcharNVarchar B
ON A.ID = B.ID
Conclusion
While a direct Linked Server connection is not possible from Azure SQL Database, the ClsRead class provides a viable alternative with flexibility and robust error handling. This approach is particularly useful in cloud-based and hybrid environments where Azure SQL Database is used in conjunction with on-premise SQL Server instances.
using System;
using System.Collections.Generic;
using System.Data;
using System.Text;
using Microsoft.Data.SqlClient;
namespace LinkedServer
{
class ClsRead
{
private string _sSourceConnectionString = “”;
private string _sTargetConnectionString = “”;
private string _sSQLToReadFromSource = “”;
private string _sTargetTable = “”;
public string SourceConnectionString
{
get
{
return _sSourceConnectionString;
}
set
{
_sSourceConnectionString = value;
}
}
public string TargetConnectionString
{
get
{
return _sTargetConnectionString;
}
set
{
_sTargetConnectionString = value;
}
}
public string SQLToExecuteFromSource
{
get
{
return _sSQLToReadFromSource;
}
set
{
_sSQLToReadFromSource = value;
}
}
public string TargetTable
{
get
{
return _sTargetTable;
}
set
{
_sTargetTable = value;
}
}
// Constructor por defecto
public ClsRead() { }
public void TransferData()
{
// Check that all properties are set
if (string.IsNullOrEmpty(SourceConnectionString) ||
string.IsNullOrEmpty(TargetConnectionString) ||
string.IsNullOrEmpty(SQLToExecuteFromSource) ||
string.IsNullOrEmpty(TargetTable))
{
throw new InvalidOperationException(“All properties must be set.”);
}
try
{
DataTable TempData = GetDataFromSource();
InsertDataIntoAzureSql(TempData);
}
catch (Exception ex)
{
// Handle the exception as necessary
Console.WriteLine(“Error during data transfer: ” + ex.Message);
// You can rethrow the exception or handle it according to your application’s needs
throw;
}
}
private DataTable GetDataFromSource()
{
DataTable dataTable = new DataTable();
try
{
using (SqlConnection connection = new SqlConnection(SourceConnectionString))
{
using (SqlCommand command = new SqlCommand(SQLToExecuteFromSource, connection))
{
connection.Open();
using (SqlDataReader reader = command.ExecuteReader())
{
dataTable.Load(reader);
}
}
}
}
catch (Exception ex)
{
// Handle the exception as necessary
Console.WriteLine(“General Error: Obtaining data from Source..” + ex.Message);
// You can rethrow the exception or handle it according to your application’s needs
throw;
}
return dataTable;
}
private void InsertDataIntoAzureSql(DataTable TempData)
{
try
{
using (SqlConnection connection = new SqlConnection(TargetConnectionString))
{
connection.Open();
using (SqlBulkCopy bulkCopy = new SqlBulkCopy(connection))
{
bulkCopy.DestinationTableName = TargetTable;
bulkCopy.BatchSize = 1000;
bulkCopy.BulkCopyTimeout = 50;
bulkCopy.WriteToServer(TempData);
}
}
}
catch (Exception ex)
{
// Handle the exception as necessary
Console.WriteLine(“General Error: Saving data into target..” + ex.Message);
// You can rethrow the exception or handle it according to your application’s needs
throw;
}
}
}
}
Microsoft Tech Community – Latest Blogs –Read More

Monthly news – January 2024
Microsoft Defender for Cloud
Monthly news
January 2024 Edition
This is our monthly “What’s new” blog post, summarizing product updates and various new assets we released over the past month. In this edition, we are looking at all the goodness from December 2023.
Legend:
Product videos
Webcasts (recordings)
Docs on Microsoft
Blogs on Microsoft
GitHub
External content
Product improvements
Announcements
Microsoft Defender for Cloud
It is now possible to manage Defender for Servers on specific resources within your subscription, giving you full control over your protection strategy. With this capability, you can configure specific resources with custom configurations that differ from the settings configured at the subscription level.
Learn more about enabling Defender for Servers at the resource level.
The Coverage workbook allows you to keep track of which Defender for Cloud plans are active on which parts of your environments. This workbook can help you to ensure that your environments and subscriptions are fully protected. By having access to detailed coverage information, you can also identify any areas that might need other protection and take action to address those areas.
Learn more about the Coverage workbook.
As the landscape of DevOps continues to expand and confront increasingly sophisticated security threats, the need for proactive attack surface reduction measures has never been more critical. To enhance DevOps security and prevent attacks, Defender for Cloud, a Cloud Native Application Protection Platform (CNAPP), is enabling customers with new capabilities: DevOps Environment Posture Management, Code to Cloud Mapping for Service Principals, and new DevOps Attack Paths.
In this blog we dive deep into how these features represent a strategic shift towards a more integrated and holistic approach to cloud native application security throughout the entire development lifecycle.
The classic multicloud connector experience is retired and data is no longer streamed to connectors created through that mechanism. These classic connectors were used to connect AWS Security Hub and GCP Security Command Center recommendations to Defender for Cloud and onboard AWS EC2s to Defender for Servers.
The full value of these connectors has been replaced with the native multicloud security connectors experience, which has been Generally Available for AWS and GCP since March 2022 at no extra cost.
The new native connectors are included in your plan and offer an automated onboarding experience with options to onboard single accounts, multiple accounts (with Terraform), and organizational onboarding with auto provisioning for the following Defender plans: free foundational CSPM capabilities, Defender Cloud Security Posture Management (CSPM), Defender for Servers, Defender for SQL, and Defender for Containers.
Over the past three years, a notable shift has unfolded in the realm of cloud security. Increasingly, security vendors are introducing agentless scanning solutions to enhance the protection of their customers. These solutions empower users with visibility into their security posture and the ability to detect threats — all achieved without the need to install any additional software, commonly referred to as an agent, onto their workloads.
This transformative phase in cloud security, embracing the agentless approach, owes its development to the robust suite of management APIs offered by cloud service providers. In this blog post, our focus will center on the technical aspects of agentless scanning applicable to virtual machines operating in the cloud. Whether it be an Azure Virtual Machine, an AWS EC2 instance, or a Google Cloud Compute instance, for simplicity’s sake, we will term them as cloud-native virtual machines (VMs).
In this article we share the technical details of our agentless scanning platform.
PostgreSQL Flexible Server support in the Microsoft Defender for open-source relational databases plan is now generally available. Microsoft Defender for open-source relational databases provides advanced threat protection to PostgreSQL Flexible Servers, by detecting anomalous activities and generating security alerts.
Learn how to Enable Microsoft Defender for open-source relational databases.
Watch new episodes of the Defender for Cloud in the Field show to learn about the Agentless secret scanning for VMs, Native integration with ServiceNow, Defender for APIs General Availability and updates from Microsoft Ignite 2023.
Microsoft Defender for Cloud Labs have been updated and now include several new detailed step by step guidance on how to enable, configure and test the Defender for Cloud capabilities.
Discover how other organizations successfully use Microsoft Defender for Cloud to protect their cloud workloads. This month we are featuring Rabobank – a Dutch multinational banking and financial services company headquartered in Utrecht, Netherlands – that uses Microsoft security solutions, including Defender for Cloud, to secure their environment.
Join our experts in the upcoming webinars to learn what we are doing to secure your workloads running in Azure and other clouds.
Note: If you want to stay current with Defender for Cloud and receive updates in your inbox, please consider subscribing to our monthly newsletter: https://aka.ms/MDCNewsSubscribe
Microsoft Tech Community – Latest Blogs –Read More
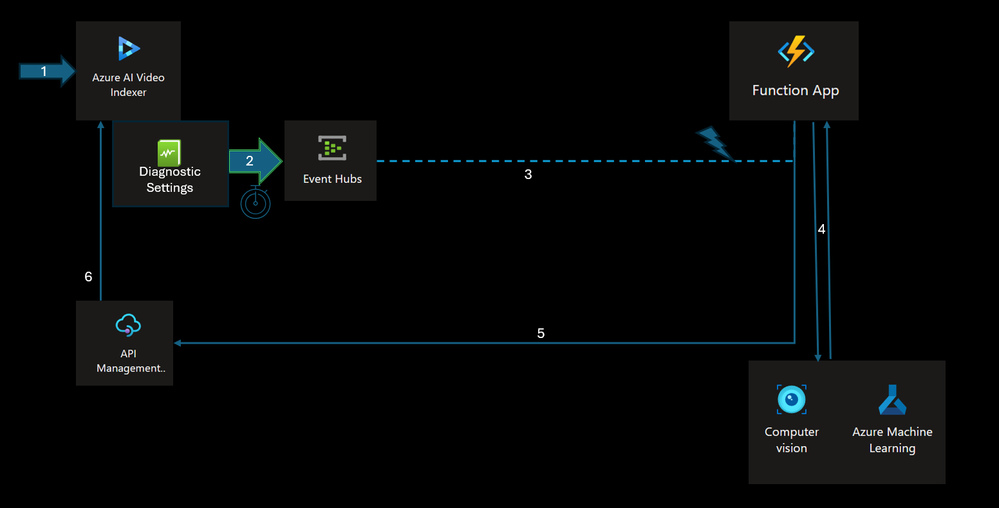
Empower Azure Video Indexer Insights with your own models
Overview
Azure Video Indexer (AVI) offers a comprehensive suite of models that extract diverse insights from the audio, transcript, and visuals of videos. Recognizing the boundless potential of AI models and the unique requirements of different domains, AVI now enables integration of custom models. This enhances video analysis, providing a seamless experience both in the user interface and through API integrations.
The Bring Your Own (BYO) capability enables the process of integrating custom models. Users can provide AVI with the API for calling their model, define the input via an Azure Function, and specify the integration type. Detailed instructions are available here.
Demonstrating this functionality, a specific example involves the automotive industry: Users with numerous car videos can now detect various car types more effectively. Utilizing AVI’s Object Detection insight, particularly the Car class, the system has been expanded to recognize new sub-classes: Jeep and Family Car. This enhancement employs a model developed in Azure AI Vision Studio using Florence, based on a few-shots learning technique. This method, leveraging the foundational Florence Vision model, enables training for new classes with a minimal set of examples – approximately 15 images per class.
The BYO capability in AVI allows users to efficiently and accurately generate new insights by building on and expanding existing insights such as object detection and tracking. Instead of starting from scratch, users can begin with a well-established list of cars that have already been detected and tracked along the video, each with a representative image. Users can then use only numerous requests for the new Florence-based model to differentiate between the cars according to their model.
Note: This article is accompanied by a step-by-step code-based tutorial. Please visit the official Azure Video Indexer “Bring Your Own” Sample under the Video Indexer Samples Github Repository.
High Level Design and Flow
To demonstrate the usage of building customized AI pipeline, we will be using the following pipeline that leverages several key aspects of Video Indexer components and integrations:
1. Users employ their existing Azure Video Indexer account on Azure to index a video, either through the Azure Video Indexer Portal or the Azure Video Indexer API.
2. The Video Indexer account integrates with a Log Analytics workspace, enabling the publication of Audit and Events Data into a selected stream. For additional details on video index collection options, refer to: Monitor Azure Video Indexer | Microsoft Learn.
3. Indexing operation events (such as “Video Uploaded,” “Video Indexed,” and “Video Re-Indexed”) are streamed to Azure Event Hubs. Azure Event Hubs enhances the reliability and persistence of event processing and supports multiple consumers through “Consumer Groups.”
4. A dedicated Azure Function, created within the customer’s Azure Subscription, activates upon receiving events from the EventHub. This function specifically waits for the “Indexing-Complete” event to process video frames based on criteria like object detection, cropped images, and insights. The compute layer then forwards selected frames to the custom model via Cognitive Services Vision API and receives the classification results. In this example it sends the crops of the representative image for each tracked car in the video.
Note: The integration process involves strategic selection of video frames for analysis, leveraging AVI’s car detection and tracking capabilities, to only process representative cropped images of each tracked car in the custom model.
5. The compute layer (Azure Function) then transmits the aggregated results from the custom model back to the Azure API to update the existing indexing data using the Update Video Index API Call.
6. The enriched insights are subsequently displayed on the Video Indexer Portal. The ID in the custom model matches the ID in the original insights JSON.
Figure 2: New Insight widget in AVI for the custom model results
Note: for more in-depth step-by-step tutorial accomplished with code sample, please consult the official Azure Video Indexer GitHub Sample under the “Bring-Your-Own” Section.
Result Analysis
The outcome is a novel insight displayed in the user interface, revealing the outcomes from the custom model. This application allowed for the detection of a new subclass of objects, enhancing the video with additional, user-specific insights. In the examples provided below, each car is distinctly classified: for instance, the white car is identified as a family car (Figure 3), whereas the red car is categorized as a jeep (Figure 4).
Figure 3: Azure Video Indexer with the new custom insight for the white car classified as family car.
Figure 4: Azure Video Indexer with the new custom insight for the red car classified as family jeep.
Conclusions
With only a handful of API calls to the bespoke model, the system effectively conducts a thorough analysis of every car featured in the video. This method, which involves the selective use of certain images for the custom model combined with insights from AVI, not only reduces expenses but also boosts overall efficiency. It delivers a holistic analysis tool to users, paving the way for endless customization and AI integration opportunities.
Microsoft Tech Community – Latest Blogs –Read More

Check This Out! (CTO!) Guide (December 2023)
Hi everyone! Brandon Wilson here once again with this month’s “Check This Out!” (CTO!) guide.
These posts are only intended to be your guide, to lead you to some content of interest, and are just a way we are trying to help our readers a bit more, whether that is learning, troubleshooting, or just finding new content sources! We will give you a bit of a taste of the blog content itself, provide you a way to get to the source content directly, and help to introduce you to some other blogs you may not be aware of that you might find helpful.
From all of us on the Core Infrastructure and Security Tech Community blog team, thanks for your continued reading and support!
Title: Renew Certificate Authority Certificates on Windows Server Core. No Problem!
Source: Ask the Directory Services Team
Author: Robert Greene
Publication Date: 12/18/23
Content excerpt:
Today’s blog strives to clearly elucidate an administrative procedure that comes along more frequently with PKI Hierarchies being deployed to Windows Server Core operating systems.
Title: Keep your Azure optimization on the right track with Azure patterns and practices
Source: Azure Architecture
Author: Ben Brauer
Publication Date: 12/13/23
Content excerpt:
Businesses are at a pivotal juncture in their cloud migration journeys, as the question is no longer “Should we do this?”, but “What’s the best way to do this?” With questions of cost, reliability, and security looming over any migration plans, Microsoft is driven to fortify your organization for a successful transformation to Azure. That’s why we offer two complementary frameworks that together provide a comprehensive approach to cloud adoption and optimization. With best-practice guidance and checklists to keep your cloud modernization on track, our goal is to help your organization avoid costly mistakes and save time by leveraging proven strategies. The Microsoft Cloud Adoption Framework (CAF) and Well-Architected Framework (WAF) are resources that businesses can leverage to confidently transform their operations into being cloud-centric and build/manage cloud-hosted applications securely and cost-effectively. In this blog we’ll take you through the purpose of each framework and how you can start applying them to your cloud migration today.
Title: How to use Azure Front Door with Azure Kubernetes Service (Tips and Tricks)
Source: Azure Architecture
Author: Pranab Paul
Publication Date: 12/26/23
Content excerpt:
As its definition says – “Azure Front Door is a global, scalable, and secure entry point for fast delivery of your web applications. It offers dynamic site acceleration, SSL offloading, domain and certificate management, application firewall, and URL-based routing”. We can consider this as an Application Gateway at global scale with CDN profile thrown in to spice it up. AGIC or Application Gateway as Ingress Controller is already available and widely used. I received this question recently, asking whether Azure Front Door can be used in the same way. I didn’t have to reinvent the wheel as so many blog posts and YouTube videos are already there on this topic. In this article, I will only discuss different options to implement Azure Front Door with AKS and will add some critical tips you should be aware of.
Title: Public Preview Announcement: Azure VM Regional to Zonal Move
Source: Azure Compute
Author: Kaza Sriram
Publication Date: 12/12/23
Content excerpt:
We are excited to announce the public preview of single instance VM regional to zonal move, a new feature that allows you to move an existing VM in a regional configuration (deployed without any infrastructure redundancy) to a zonal configuration (deployed into specific Azure availability zone) within the same region. This feature announcement continues the momentum with our earlier announced VMSS Zonal expansion features and reinforces the Azure wide zonal strategy, that enables you to take advantage of higher availability with Azure availability zones and make them an integral part of your comprehensive business continuity and resiliency strategy.
This feature is intended for single instance VMs in regional configurations only and not for VMs already in availability zones, or VMs part of an availability set (AvSet) or Virtual Machine Scale Sets (VMSS).
Title: Interconnected guidance for an optimized cloud journey
Source: Azure Governance and Management
Author: Antonio Ortoll
Publication Date: 12/11/23
Content excerpt:
The cost of cloud computing can add up quickly, especially for businesses with a high volume of data, high traffic or mission-critical applications. As organizations increasingly put cloud capabilities to work, they are constantly looking for ways to trim costs and focus their cloud spend to align to the right business priorities. Cost optimization is key to making that happen. But how do you know when there are opportunities to optimize?
To make it easier for you to identify cost optimization opportunities during every step of your Azure journey, we provide resources, tools and guidance to help you evaluate your costs, identify efficiencies, and set you up for success. From building your business case to optimizing new workloads, you’ll find interconnected guidance and assessments designed to continually increase the value of your Azure investments and enable you to invest in projects that drive ongoing business growth and innovation. Whether you’re migrating to the cloud for the first time or already have Azure workloads in place, these cost management, governance and monitoring tools can help you visualize your costs and gain insights.
Let’s take a closer look at each of these tools and how you can use them to understand and forecast your bill, optimize workload costs, and control your spending.
Title: Azure Firewall: New Embedded Workbooks
Source: Azure Network Security
Author: Eliran Azulai
Publication Date: 12/4/23
Content excerpt:
After our previous announcement in August 2023, we want to delve deeper into the enhanced capabilities of the new embedded workbooks. Within Azure, Workbooks serve as a versatile canvas for conducting data analysis and generating visually compelling reports directly within the Azure portal. They empower users to access diverse data sources across Azure, amalgamating them into cohesive, interactive experiences. Workbooks enable the amalgamation of various visualizations and analyses, making them ideal for unrestricted exploration.
Notably, the Azure Firewall Portal has now incorporated embedded workbooks functionality, offering customers a seamless means to analyze Azure Firewall traffic. This feature facilitates the creation of sophisticated visual reports within the Azure portal, allowing users to leverage data from multiple Firewalls deployed across Azure and unify them into interactive, cohesive experiences.
Title: Azure Firewall’s Auto Learn SNAT Routes: A Guide to Dynamic Routing and SNAT Configuration
Source: Azure Network Security
Author: David Frazee
Publication Date: 12/21/23
Content excerpt:
Azure Firewall is a cloud-native network security service that protects your Azure virtual network resources. It is a fully stateful firewall as a service with built-in high availability and unrestricted cloud scalability. However, some Azure Firewall customers may face challenges when they need to configure non-RFC-1918 address spaces to not SNAT through the Azure Firewall. This can cause issues with routing, connectivity, and performance. To address this problem, Azure Firewall has introduced a new feature that allows customers to specify which address spaces should not be SNATed by the firewall. This feature can help customers reduce the overhead of managing custom routes and NAT rules and improve the efficiency and reliability of their network traffic. In this blog, we will explain how the feature works, what Azure Route Server is, and how to enable it. We will also provide a QuickStart guide and some examples to help you get started with this feature.
Title: Securely uploading blob files to Azure Storage from API Management
Source: Azure PaaS
Author: Una Chen
Publication Date: 12/26/23
Content excerpt:
This article will provide a demonstration on how to utilize either SAS token authentication or managed identity from API Management to make requests to Azure Storage. Furthermore, it will explore and compare the differences between these two options.
Title: The Twelve Days of Blog-mas: No.4 – Sync Cloud Groups from AAD/Entra ID back to Active Directory
Source: Core Infrastructure and Security
Author: Michael Hildebrand
Publication Date: 12/1/23
Content excerpt:
For a loooong time, you and I have been waiting for the ability to sync ‘cloud-born-and-managed’ security groups (and their memberships) back into on-premises AD. This takes us further on our journey of moving “the management plane” from on-prem AD to the cloud – and provides you the ability to create/manage groups in the cloud to manage resource access in Active Directory.
Title: The Twelve Days of Blog-mas: No.5 – The Endpoint Management Jigsaw
Source: Core Infrastructure and Security
Author: Michael Hildebrand
Publication Date: 12/5/23
Content excerpt:
Most orgs (hopefully) have a well-developed ‘practice’ around Endpoint management, combining people, process and technology to deploy, configure, operate and support a fleet of devices that adhere to corporate policy. This has been a main-stay of endpoint IT Pros for decades.
As IT Pros, whether we like it or not, we’re continually expanding our knowledge and skills to account for the ever-growing scope that we’re accountable for and the winds of change in technology. The cloud, mobile devices, BYO, VDI and other flavors of endpoints – as well as a global pandemic – have all pushed or pulled (or dragged) us to where we are “today.”
Title: Switch to the New Defender for Resource Manager Pricing Plan
Source: Core Infrastructure and Security
Author: Felipe Binotto
Publication Date: 12/5/23
Content excerpt:
In case you missed it, a new pricing plan has been announced for Microsoft Defender for Resource Manager.
The legacy pricing plan (per-API call) is priced at $4 per 1M API Calls, which can become a bit expensive if there is a lot going on in your subscriptions.
The new pricing plan (per-subscription) is priced at $5 per subscription per month.
We have made available a workbook which provides a cost estimation for all the Defender plans across all your subscriptions.
Title: The Twelve Days of Blog-mas: No. 6 – The Reporting Edition – Microsoft Community Hub
Source: Core Infrastructure and Security
Author: Michael Hildebrand
Publication Date: 12/6/23
Content excerpt:
Good morning, Internet! At first glance, this post may appear a weeee bit thin … but sometimes, less is more. Who doesn’t need/want more reporting/visualizations and tracking of what’s going on within an environment?
I think it’s safe to say that when it comes to “Reporting,” it often feels like less actually is ‘less’ (and sometimes, ‘more’ is even less ‘less,’ or ‘more less?’ How should one say that?). Reporting is never ‘enough’ or ‘done’ but we steadily expand and improve that aspect of our services – and we’re constantly doing more.
Title: The Twelve Days of Blog-mas: No. 7 – Architecture Visuals – for Your Reference or Your Own Docs
Source: Core Infrastructure and Security
Author: Michael Hildebrand
Publication Date: 12/7/23
Content excerpt:
A softball for #7 … enjoy!
Title: The Twelve Days of Blog-mas: No. 8 – The Evolution of Windows Server Management
Source: Core Infrastructure and Security
Author: Michael Hildebrand
Publication Date: 12/8/23
Content excerpt:
As was discussed previously, our Endpoint Management modernization story is compelling. The server team overheard that good news and is curious – but the Server Management discipline is quite different than Endpoint management.
Server teams manage/operate systems that are usually locked away in datacenters – either their own and/or a cloud provider. They’re usually not exposed to physical loss or theft, nor people shoulder-surfing at a coffee shop. They’re usually only accessible via remote management capabilities. They usually have much more stringent change control and update processes – and often extreme business sensitivity to reboots (especially unplanned, but planned ones, too).
So, what is our Server Management story then, circa ‘Holidays 2023?’
Well, I’m glad you asked – and I get this question a lot these days.
Title: Introduction to Network Trace Analysis 4: DNS (it’s always DNS)
Source: Core Infrastructure and Security
Author: Will Aftring
Publication Date: 12/11/23
Content excerpt:
Howdy everyone! I’m back to talk about one of my favorite causes of heartache, the domain name system (DNS). This will be our first foray into an application layer protocol. The concept of DNS is simple enough, but it can lead to some confusing situations if you don’t keep its function in mind. No time to waste, let’s get going!
Title: The Twelve Days of Blog-mas: No.9 – It’s a Multi-Tenant and Cross-Platform World: Part I
Source: Core Infrastructure and Security
Author: Michael Hildebrand
Publication Date: 12/12/23
Content excerpt:
Greetings! Before the cloud, when on-prem Active Directory was the hub of many enterprise architectures, business needs often drove the requirement to expand single-domain AD forests into multi-domain AD forests. Even in the NT days, one might have ‘Account Domains’ and ‘Resource Domains’ – connected via one-ways trusts. As was often the case, multiple existing NT 4.0 domains were ‘upgraded’ into a single AD forest, as additional domains. These days, a single-domain AD Forest is pretty rare for main-stream use.
Title: The Twelve Days of Blog-mas: No.10 – It’s a Multi-Tenant and Cross-Platform World: Part II
Source: Core Infrastructure and Security
Author: Michael Hildebrand
Publication Date: 12/13/23
Content excerpt:
In Part I of this mini-series, I discussed some of the new hotness around multi-tenant capabilities in our Entra ID space. In Part II, I’ll cover cross-platform support across several of our cloud services. The cloud era ushered in mainstream cross-platform support from many Microsoft services. Like the title of this post says, anymore, it’s a cross-platform world.
Title: The Twelve Days of Blog-mas: No.11 – The Kitchen Sink
Source: Core Infrastructure and Security
Author: Michael Hildebrand
Publication Date: 12/14/23
Content excerpt:
I am running out of days for my “Twelve Days” timeframe, so I’m dropping a pile of topics here that I feel are important/helpful but less-known.
Apologies in advance for the brevity and link-breadcrumbs.
Title: The Twelve Days of Blog-mas: No.12 – Copilot(s) – Your AI Assistant(s)
Source: Core Infrastructure and Security
Author: Michael Hildebrand
Publication Date: 12/15/23
Content excerpt:
Now, you didn’t really think I would go for 12 without one about Copilot, did you?
Our AI/ML efforts have been on-going for a long time, but very recently, they’ve gone mainstream -and SUCH a cool logo/icon. Be aware, though, for now, this space changes frequently, varies by region/market and software version (Windows, Office apps, Edge, etc.). Docs, product names, major and minor functionality are all moving very fast. Do your brain a favor and make some peace with that – but then, jump into the pool!
Title: Designing Cloud Architecture: Creating Professional Azure Diagrams with PowerPoint
Source: Core Infrastructure and Security
Author: Werner Rall
Publication Date: 12/17/23
Content excerpt:
In the fast-evolving landscape of cloud computing, the ability to visually represent complex architectures is not just a skill but a necessity. Among the myriad of tools and platforms, Microsoft Azure stands as a titan, offering a vast array of services that cater to diverse computing needs. However, the true challenge lies in effectively communicating the structure and functionality of Azure-based solutions. This is where the power of visualization comes into play, and surprisingly, a tool as familiar as PowerPoint emerges as an unlikely ally.
Title: Windows 365 deployment checklist
Source: FastTrack
Author: Josh Gutierrez
Publication Date: 12/22/23
Content excerpt:
We’re excited to announce that we’ve just released an updated Windows 365 deployment checklist in the Microsoft 365 admin center (MAC).
Title: Known Issue: Some management settings become permanent on Android 14
Source: Intune Customer Success
Author: Intune Support Team
Publication Date: 12/18/23
Content excerpt:
Google recently identified two issues in Android 14 that make some management policies permanent on non-Samsung devices. When a device is upgraded from Android 13 to Android 14, certain settings are made permanent on the device. Additionally, when devices that have been upgraded to Android 14 are rebooted, other settings are made permanent on the device.
Title: Transforming the iOS/iPadOS ADE experience in Microsoft Intune – Microsoft Community Hub
Source: Intune Customer Success
Author: Intune Support Team
Publication Date: 12/19/23
Content excerpt:
In July of 2021, we announced that Running the Company Portal in Single App Mode until authentication is not a supported flow by Apple for iOS/iPadOS automated device enrollment (ADE). Since then, we’ve been hard at work to improve the ADE experience through the release of Setup Assistant with modern authentication, Just in Time (JIT) registration and compliance remediation, and the “Await until configuration” setting.
Title: Wired for Hybrid – What’s New in Azure Networking December 2023 edition
Source: ITOps Talk
Author: Pierre Roman
Publication Date: 12/20/23
Content excerpt:
Azure Networking is the foundation of your infrastructure in Azure. Each month we bring you an update on What’s new in Azure Networking.
In this blog post, we’ll cover what’s new with Azure Networking in December 2023. In this blog post, we will cover the following announcements and how they can help you.
Enjoy!
Title: Deploy secret-less Conditional Access policies with Microsoft Entra ID Workload Identity Federation
Source: Microsoft Entra (Azure AD)
Author: Claus Jespersen
Publication Date: 12/4/23
Content excerpt:
Many customers face challenges in managing their Conditional Access (CA) policies. Over time, they accumulate more and more policies that are created ad-hoc to solve specific business scenarios, resulting in a loss of overview and increased troubleshooting efforts. Microsoft has provided guidance on how to structure your Conditional Access policies in a way that follows the Zero Trust principles, using a persona-based approach. The guidance includes a set of Conditional Access policies that can serve as a starting point. These CA policies can be automated from a CI/CD pipeline using various tools. One such tool is Microsoft365DSC, an open-source tool developed by members of the Microsoft Graph Product Group, who are still actively involved in its maintenance.
Title: Enhancements to Microsoft Entra certificate-based authentication
Source: Microsoft Entra (Azure AD)
Author: Alex Weinert; Vimala Ranganathan
Publication Date: 12/13/23
Content excerpt:
At Ignite 2022, we announced the general availability of Microsoft Entra certificate-based authentication (CBA) as part of Microsoft’s commitment to Executive Order 14028, Improving the Nation’s Cybersecurity. Based on our experience working with government customers, PIV/CAC cards are the most common authentication method used within the federal government. While valuable for all customers, the ability to use X.509 certificate for authentication directly against Entra ID is particularly critical for federal government organizations using PIV/CAC cards and looking to easily comply with the Executive Order 14028 requirements as well as customers who want to migrate from a federated server like Active Directory Federated Server to Entra ID for CBA.
Since then, we’ve added many new features and enhancements, which made CBA available on all platforms, including mobile, with support for certificates on devices as well as external security keys like YubiKeys. Customers now have more control and flexibility to tailor authentication policies by certificate and resource type, as well as user group and select certificate strength for different users, use CBA with other methods for multi-factor or step-up authentication, and set high affinity (strong) binding for either the entire tenant or by user group.
Vimala Ranganathan, Product Manager on Microsoft Entra, will now talk about how these new features will help in your journey toward phishing-resistant MFA.
Title: Introducing New Features of Microsoft Entra Permissions Management
Source: Microsoft Entra (Azure AD)
Author: Joseph Dadzie
Publication Date: 12/14/23
Content excerpt:
Microsoft Entra Permissions Management is a Cloud Infrastructure Entitlement Management (CIEM) solution that helps organizations manage the permissions of any identity across organizations’ multicloud infrastructure. With Permissions Management, organizations can assess, manage, and monitor identities and their permissions continuously and right-size them based on past activity.
Today, we’re thrilled to unveil the details of our Ignite announcement and introduce new features and APIs for Permissions Management, enhancing your overall permissions management experience.
Title: Advancing Cybersecurity: The Latest enhancement in Phishing-Resistant Authentication
Source: Microsoft Entra (Azure AD)
Author: Alex Weinert
Publication Date: 12/15/23
Content excerpt:
Today, I’m excited to share with you several new developments in the journey towards phishing-resistant authentication for all users! This isn’t just essential for compliance with Executive Order 14028 on Improving the Nation’s Cybersecurity but is increasingly critical for the safety of all the orgs and users who bet on digital identity.
Title: Strengthening identity protection in the face of highly sophisticated attacks
Source: Security, Compliance, and Identity
Author: Alex Weinert
Publication Date: 12/12/23
Content excerpt:
When it comes to security at Microsoft, we’re customer zero as our Chief Security Advisor and CVP Bret Arsenault often emphasizes. That means we think a lot about how we build security into everything we do—not only for our customers—but for ourselves. We continuously work to improve the built-in security of our products and platforms. With the unparalleled breadth of our digital landscape and the integral role we play in our customers’ businesses, we feel a unique responsibility to take a leadership role in securing the future for our customers, ourselves, and our community.
To that end, on November 2nd, 2023, we launched the Secure Future Initiative (SFI). It’s a multi-year commitment to advance the way we design, build, test, and operate our technology to ensure we deliver solutions that meet the highest possible standards of security.
Title: A new, modern, and secure print experience from Windows
Source: Security, Compliance, and Identity
Author: Johnathan Norman
Publication Date: 12/13/23
Content excerpt:
Over the past year, the MORSE team has been working in collaboration with the Windows Print team to modernize the Windows Print System. This new design represents one of the largest changes to the Windows Print stack in more than 20 years. The goal was to build a more modern and secure print system that maximizes compatibility and puts users first. We are calling this new platform Windows Protected Print Mode (WPP). We believe users should be Secure-by-Default which is why WPP will eventually be on by default in Windows.
Title: Plan for Windows 10 EOS with Windows 11, Windows 365, and ESU
Source: Windows IT Pro
Author: Jason Leznek
Publication Date: 12/5/23
Content excerpt:
Windows 10 will reach end of support (EOS) on October 14, 2025. While two years may seem like a long runway, ensuring a modernized infrastructure will help keep your organization productive and its data secure. We’re encouraged to see organizations realizing the benefits of Windows 11 by upgrading eligible devices to Windows 11 well ahead of the EOS date. Consider joining organizations like Westpac who recently leveraged Microsoft Intune, Windows Autopatch, and App Assure to efficiently move 40,000 employees to Windows 11, while also incorporating new Windows 11 devices as part of a regular hardware refresh cycle.
In this post, learn about the various options you have to smoothly transition to Windows 11, including extended protection for those needing more time.
Title: Upcoming changes to Windows Single Sign-On
Source: Windows IT Pro
Author: Adam Steenwyk
Publication Date: 12/14/23
Content excerpt:
Microsoft has been working to ensure compliance with the Digital Markets Act (DMA) in the European Economic Area (EEA). As part of this ongoing commitment to provide your organization with solutions that comply with global regulations like the DMA, we will be changing the ways Windows works. Signing in to apps on Windows is one area where we will be making such changes.
Title: Skilling snack: Network security basics for endpoints
Source: Windows IT Pro
Author: Clay Taylor
Publication Date: 12/14/23
Content excerpt:
Why is network security important? In the chip-to-cloud environment, every component adds a layer of protection. It’s the Zero Trust approach to Windows security. We’ve already covered the basics of endpoint, identity, and data security in Skilling snack: Windows security fundamentals. You can also dig into another layer with Skilling snack: Windows application security. Today, let’s bake in a high-level overview of network security capabilities and options.
Previous CTO! Guides:
CIS Tech Community-Check This Out! (CTO!) Guides
Additional resources:
Azure documentation
Azure pricing calculator (VERY handy!)
Microsoft Azure Well-Architected Framework
Microsoft Cloud Adoption Framework
Windows Server documentation
Windows client documentation for IT Pros
PowerShell documentation
Core Infrastructure and Security blog
Microsoft Tech Community blogs
Microsoft technical documentation (Microsoft Docs)
Sysinternals blog
Microsoft Learn
Microsoft Support (Knowledge Base)
Microsoft Archived Content (MSDN/TechNet blogs, MSDN Magazine, MSDN Newsletter, TechNet Newsletter)
Microsoft Tech Community – Latest Blogs –Read More

Domain and certificate bindings for IDN hostnames in Azure App Service
Overview
When it comes to website security, one important step is to add a custom domain and connect it with a TLS/SSL certificate. This not only enhances the trust and safety of your website but also ensures that your visitors’ information is encrypted and protected. Azure App Service provides TLS bindings for the most common custom domains. This blog discusses the special domain and certificate binding situations in Azure App Service for IDN hostnames.
What is an IDN hostname?
An IDN hostname is a domain name that includes characters used in the local representation of languages not written with the basic Latin alphabet “a-z”. These characters can be Arabic, Hebrew, Chinese, Cyrillic, Tamil, Hindi, and more.
What is Punnycode?
Domain bindings for IDN hostnames in Azure App Service
There are several common ways to bind a domain to the Azure App Service, such as Azure portal, Azure CLI/ PowerShell, and ARM template. For domain bindings on the portal, it is not supported yet to add IDN hostnames. For now, we only support domains with alphanumeric characters (A-Z, a-z, 0-9), period (‘.’), dash (‘-‘), and asterisk (‘*’) to be added.
For domain bindings with Azure CLI/ PowerShell/ ARM template, we could currently bypass this validation and could add those special punny code characters successfully. Referencing this blog: Create and bind the custom domain contains special Unicode character in App Service Using Azure CLI – Microsoft Community Hub
Certificate validations for IDN hostnames in Azure App Service
To enable secure communication between the App Service and the client, a TLS/SSL certificate is necessary. There are two types of certificates to secure your domain: wildcard certificates and standard certificates. A wildcard certificate secures multiple subdomains under a single domain, while a standard certificate is specific to a single domain. In most use cases, a wildcard cert will be used to secure different subdomains as this is more manageable.
In the scenario of binding the certificate to the IDN hostnames, a wildcard cert is not recommended as it will encounter unexpected errors.
Error message:
Error screenshot:
Getting an error from PowerShell command lines as well
Workaround:
We are splitting the wildcard certificate when validating from the backend and this is why we are getting the unmatching error. The quickest workaround for now is to request a standard certificate specific to this hostname.
Summary
Overall, Azure App Service somehow enables you to configure domain bindings for IDN hostnames. You can associate an IDN hostname with your Azure App Service app with command lines. Additionally, you can manage the certificate bindings for these domains with standard certificates, ensuring security.
Microsoft Tech Community – Latest Blogs –Read More
Lesson Learned #469:Implementing a Linked Server Alternative with Azure SQL Database and C#
In scenarios where direct Linked Server connections are not feasible, such as between Azure SQL Database and an on-premise SQL Server, developers often seek alternative solutions. This blog post introduces a C# implementation that simulates the functionality of a Linked Server for data transfer between Azure SQL Database and SQL Server, providing a flexible and efficient way to exchange data.
Overview of the Solution
The proposed solution involves a C# class, ClsRead, designed to manage the data transfer process. The class connects to both the source (SQL Server) and the target (Azure SQL Database), retrieves data from the source, and inserts it into the target database.
Key Features
Connection Management: ClsRead maintains separate connection strings for the source and target databases, allowing for flexible connections to different SQL Server and Azure SQL Database instances.
Data Transfer Control: The class includes methods to execute a SQL query on the source database, retrieve the results into a DataTable, and then use SqlBulkCopy to efficiently insert the data into the target Azure SQL Database.
Error Handling: Robust error handling is implemented within each method, ensuring that any issues during the connection, data retrieval, or insertion processes are appropriately logged and can be managed or escalated.
Implementation Details
Class Properties
SourceConnectionString: Connection string to the source SQL Server.
TargetConnectionString: Connection string to the target Azure SQL Database.
SQLToExecuteFromSource: SQL query to be executed on the source database.
TargetTable: Name of the target table in Azure SQL Database where data will be inserted.
Methods
TransferData(): Coordinates the data transfer process, including validation of property values.
GetDataFromSource(): Executes the SQL query on the source database and retrieves the results.
InsertDataIntoAzureSql(DataTable TempData): Inserts the data into the target Azure SQL Database using SqlBulkCopy.
Error Handling
The methods include try..catch blocks to handle any exceptions, ensuring that errors are logged, and the process can be halted or adjusted as needed.
Usage Scenario
A typical use case involves setting up the ClsRead class with appropriate connection strings, specifying the SQL query and the target table, and then invoking TransferData(). This process can be used to synchronize data between different databases, migrate data, or consolidate data for reporting purposes.
For example, we have in our on-premise server the table PerformanceVarcharNVarchar that we need only the top 2000 rows and we need to compare with the table PerformanceVarcharNVarchar in our Azure SQL Database.
The first thing that we are going to perform is to create the temporal table, of course, we could create a normal table.
DROP TABLE IF EXISTS [##__MyTable__]
CREATE Table [##__MyTable__] (ID INT Primary Key)
Once we have created the table we are going to call our ClsRead with the following parameters:
static void Main(string[] args)
{
ClsRead oClsRead = new ClsRead();
oClsRead.SourceConnectionString = “Server=OnPremiseServer;User Id=userName;Password=Pwd1!;Initial Catalog=DbSource;Connection Timeout=30;Pooling=true;Max Pool size=100;Min Pool Size=1;ConnectRetryCount=3;ConnectRetryInterval=10;Application Name=ConnTest”;
oClsRead.TargetConnectionString = “Server=tcp:servername.database.windows.net,1433;User Id=username1;Password=pwd2;Initial Catalog=DBName;Persist Security Info=False;MultipleActiveResultSets=False;Encrypt=True;TrustServerCertificate=False;Connection Timeout=30;Pooling=true;Max Pool size=100;Min Pool Size=1;ConnectRetryCount=3;ConnectRetryInterval=10;Application Name=ConnTest”;
oClsRead.SQLToExecuteFromSource = “Select TOP 2000 ID from dbo.PerformanceVarcharNVarchar”;
oClsRead.TargetTable = “[##__MyTable__]”;
oClsRead.TransferData();
}
If everything has been executed correctly, we could execute, queries like this one:
select * from [##__MyTable__] A
INNER JOIN PerformanceVarcharNVarchar B
ON A.ID = B.ID
Conclusion
While a direct Linked Server connection is not possible from Azure SQL Database, the ClsRead class provides a viable alternative with flexibility and robust error handling. This approach is particularly useful in cloud-based and hybrid environments where Azure SQL Database is used in conjunction with on-premise SQL Server instances.
using System;
using System.Collections.Generic;
using System.Data;
using System.Text;
using Microsoft.Data.SqlClient;
namespace LinkedServer
{
class ClsRead
{
private string _sSourceConnectionString = “”;
private string _sTargetConnectionString = “”;
private string _sSQLToReadFromSource = “”;
private string _sTargetTable = “”;
public string SourceConnectionString
{
get
{
return _sSourceConnectionString;
}
set
{
_sSourceConnectionString = value;
}
}
public string TargetConnectionString
{
get
{
return _sTargetConnectionString;
}
set
{
_sTargetConnectionString = value;
}
}
public string SQLToExecuteFromSource
{
get
{
return _sSQLToReadFromSource;
}
set
{
_sSQLToReadFromSource = value;
}
}
public string TargetTable
{
get
{
return _sTargetTable;
}
set
{
_sTargetTable = value;
}
}
// Constructor por defecto
public ClsRead() { }
public void TransferData()
{
// Check that all properties are set
if (string.IsNullOrEmpty(SourceConnectionString) ||
string.IsNullOrEmpty(TargetConnectionString) ||
string.IsNullOrEmpty(SQLToExecuteFromSource) ||
string.IsNullOrEmpty(TargetTable))
{
throw new InvalidOperationException(“All properties must be set.”);
}
try
{
DataTable TempData = GetDataFromSource();
InsertDataIntoAzureSql(TempData);
}
catch (Exception ex)
{
// Handle the exception as necessary
Console.WriteLine(“Error during data transfer: ” + ex.Message);
// You can rethrow the exception or handle it according to your application’s needs
throw;
}
}
private DataTable GetDataFromSource()
{
DataTable dataTable = new DataTable();
try
{
using (SqlConnection connection = new SqlConnection(SourceConnectionString))
{
using (SqlCommand command = new SqlCommand(SQLToExecuteFromSource, connection))
{
connection.Open();
using (SqlDataReader reader = command.ExecuteReader())
{
dataTable.Load(reader);
}
}
}
}
catch (Exception ex)
{
// Handle the exception as necessary
Console.WriteLine(“General Error: Obtaining data from Source..” + ex.Message);
// You can rethrow the exception or handle it according to your application’s needs
throw;
}
return dataTable;
}
private void InsertDataIntoAzureSql(DataTable TempData)
{
try
{
using (SqlConnection connection = new SqlConnection(TargetConnectionString))
{
connection.Open();
using (SqlBulkCopy bulkCopy = new SqlBulkCopy(connection))
{
bulkCopy.DestinationTableName = TargetTable;
bulkCopy.BatchSize = 1000;
bulkCopy.BulkCopyTimeout = 50;
bulkCopy.WriteToServer(TempData);
}
}
}
catch (Exception ex)
{
// Handle the exception as necessary
Console.WriteLine(“General Error: Saving data into target..” + ex.Message);
// You can rethrow the exception or handle it according to your application’s needs
throw;
}
}
}
}
Microsoft Tech Community – Latest Blogs –Read More

Decoding the Dynamics: Dapr vs. Service Meshes
Dapr and Service Meshes are more and more usual suspects in Cloud native architectures. However, I noticed that there is still some confusion about their purpose, especially because of some overlapping features. People sometimes wonder how to choose between Dapr and a Service Mesh or even if both should be enabled at the same time.
The purpose of this post is to highlight the differences, especially on the way they handle mTLS, as well as the impact on the application code itself. You can already find a summary about how Dapr and Service Meshes differ on the Dapr web site but the explanations are not deep enough to really understand the differences. This blog post is an attempt to dive deeper and give you a real clue on what’s going on behind the scenes. Let me first start with what Dapr and Service Meshes have in common.
Things that Dapr and Service Meshes have in common
Secure service-to-service communication with mTLS encryption
Service-to-service metric collection
Service-to-service distributed tracing
Resiliency through retries
Yes, this is the exact same list as the one documented on the Dapr web site! However, I will later focus on the mTLS bits because you might think that these are equivalent, overlapping features but the way Dapr and Service Meshes enforce mTLS is not the same. I’ll show some concrete examples with Dapr and the Linkerd Service Mesh to illustrate the use cases.
On top of the above list, I’d add:
They both leverage the sidecar pattern, although the Istio Service Mesh is exploring the Ambient Mesh, which is sidecar free, but the sidecar approach is still mainstream today. Here again, the role of the sidecars and what happens during the injection is completely different between Dapr and Service Meshes.
They both allow you to define fine-grained authorization policies
They both help deal with distributed architectures
Before diving into the meat of it, let us see how they totally differ.
Differences between Dapr and Service Meshes
Applications are Mesh-agnostic, while they must explicitly be Dapr-aware to leverage the Dapr capabilities. Dapr infuses the application code. Being Dapr-aware does not mean that you must use a specific SDK. Every programming language that has an HTTP client and/or gRPC client can benefit from the great Dapr features. However, the application must comply to some Dapr pre-requisites, as it must expose an API to initialize Dapr’s app channel.
Meshes can deal with both layer-4 (TCP) and layer-7 traffic, while Dapr is focused on layer-7 only protocols such as HTTP, gRPC, AMQP, etc.
Meshes serve infrastructure purposes while Dapr serves application purposes
Meshes typically have smart load balancing algorithms
Meshes typically let you define dynamic routes across multiple versions of a given web site/API
Some meshes ship with extra OAuth validation features
Some meshes let you stress your applications through Chaos Engineering techniques, by injecting faults, artificial latency, etc.
Meshes typically incur a steep learning curve while Dapr is much smoother to learn. On the contrary, Dapr even eases the development of distributed architectures.
Dapr provides true service discovery, not meshes
Dapr is designed from the ground up to deal with distributed and microservice architectures, while meshes can help with any architecture style, but prove to be a good ally for microservices.
Demo material
I will reuse one demo app that I developed 4 years ago (time flies), which is a Linkerd Calculator. The below figure illustrates it:
Some services talking together. MathFanBoy, a console app randomly talking to the arithmetic operations, while the percentage operation also calls multiplication and division. The goal of this app was to generate traffic and show how Linkerd helped us see in near real time what’s going on. I also purposely introduced exceptions by performing divisions by zero…to also demo how Linkerd (or any other mesh) helps spot errors. Feel free to clone the repo and try it out on your end if you want to test what is later described in this post. I have now created the exact same app, using Dapr, which is made available here. Let us now dive into the technical details.
Diving into the technical differences
Invisible to the application code vs code awareness
As stated earlier, an application is agnostic to the fact that it is injected or not by a Service Mesh. If you look at the application code of the Linkerd Calculator, you won’t find anything related to Linkerd. The magic happens at deployment time where we annotate our K8s deployment to make sure the application gets injected by the Mesh. On the other hand, the application code of the Dapr calculator is directly impacted in multiple ways:
– While I could use a mere .NET Console App for the Linkerd Calculator, I had to turn MathFanBoy into a web host, to comply with the Dapr app initialization channel. However, because MathFanBoy generates activity by calling random operations, I could not just turn it as an API, so I had to run different tasks in parallel. Here are the most important bits:
class Program
{
static string[] endpoints = null;
static string[] apis = new string[5] { “addition”, “division”, “multiplication”, “substraction”, “percentage” };
static string[] operations = new string[5] { “addition/add”, “division/divide”, “multiplication/multiply”, “substraction/substract”, “percentage/percentage” };
static async Task Main(string[] args)
{
var host = CreateHostBuilder(args).Build();
var runHostTask = host.RunAsync();
var loopTask = Task.Run(async () =>
{
while (true)
{
var pos = new Random().Next(0, 5);
using var client = new DaprClientBuilder().Build();
var operation = new Operation { op1 = 10, op2 = 2 };
try
{
var response = await client.InvokeMethodAsync<object, object>(
apis[pos], // The name of the Dapr application
operations[pos], // The method to invoke
operation); // The request payload
Console.WriteLine(response);
}
catch(Exception ex) {
Console.WriteLine(ex.ToString());
}
await Task.Delay(5000);
}
});
await Task.WhenAll(runHostTask, loopTask);
}
public static IHostBuilder CreateHostBuilder(string[] args) =>
Host.CreateDefaultBuilder(args)
.ConfigureWebHostDefaults(webBuilder =>
{
webBuilder.UseStartup<Startup>();
});
}
Lines 9 and 10 create the web host. Between lines 13 and 35, I generate random calls to the operations, but here again we have another difference as the application is using the Dapr Client’s InvokeMethodAsync to perform the calls. As you might have noticed, the application does not need to know the URL of these services. Dapr will discover where the services are located, thanks to its Service Discovery feature. The only thing we need to provide is the App ID and the operation that we want to call. With the Linkerd calculator, I had to know the endpoints of the target services, so they were injected through environment variables during the deployment. The same principles apply to the percentage operation, which is a true API. I had to inject the Dapr client through Dependency Injection:
public void ConfigureServices(IServiceCollection services)
{
services.AddControllers().AddDapr();
}
In order to to get an instance through the controller’s constructor:
public PercentageController(ILogger<PercentageController> logger, DaprClient dapr)
{
_logger = logger;
_dapr = dapr;
}
and use that instance to call the division and multiplication operations from within another controller operation, using again the Invoke method as for MathFanBoy. As you can see, the application code is explicitly using Dapr and must comply to some Dapr requirements. Dapr has many features other than Service Discovery but I’ll stick to that since the point is made that a Dapr-injected Application must be Dapr-aware while it is completely agnostic of a Service Mesh.
mTLS
Now things will get a bit more complicated. While both Service Meshes and Dapr implement mTLS as well as fine-grained authorization policies based on the client certificate presented by the caller to the callee, the level of protection of Dapr-injected services is not quite the same as the one from Mesh-injected services.
Roughly, you might think that you end up with something like this:
A very comparable way of working between Dapr and Linkerd. This is correct but only to some extents. If we take the happy path, meaning every pod is injected by Linkerd or Dapr, we should end up in the above situation. However, in a K8s cluster, not every pod is injected by Dapr nor Linkerd. The typical reason why you enable mTLS is to make sure injected services are protected from the outside world. By outside world, I mean anything that is not either Dapr-injected, either Mesh-injected. However, with Dapr, nothing prevents the following situation:
The blue path is taking the Dapr route and is both encrypted and authenticated using mTLS. However, the green paths from both a Dapr-injected pod and a non-Dapr pod still goes through in plain text and anonymously. How come is that possible?
For the blue path, the application is going through the Dapr route ==> http://localhost:3500/ this is the port that the Daprd sidecar listens to. In that case, the sidecar will find out the location of the target and will talk to the target service’s sidecar. However, because Dapr does not intercept network calls, nothing prevents you from taking a direct route, from both a Dapr-injected pod and a non-Dapr one (green paths). So, you might end up in a situation where you enforce a strict authorization policy as shown below:
apiVersion: dapr.io/v1alpha1
kind: Configuration
metadata:
name: multiplication
namespace: dapr-calculator
spec:
accessControl:
defaultAction: deny
trustDomain: “public”
policies:
– appId: mathfanboy
defaultAction: allow
trustDomain: ‘public’
namespace: “dapr-calculator”
– appId: percentage
defaultAction: allow
trustDomain: ‘public’
namespace: “dapr-calculator”
where you only allow MathFanBoy and Percentage to call the multiplication operation, and yet have other pods bypass the Dapr sidecar, which ultimately defeats the policy itself. Make no mistake, the reason why we define such policies is to enforce a certain behavior and I don’t have peace of mind if I know that other routes are still possible.
So, in summary, Dapr’s mTLS and policies are only effective if you take the Dapr route but nothing prevents you from taking another route.
Let us see how this works with Linkerd. As stated on their web site, Linkerd also does not enforce mTLS by default and has added this to their backlog. However, with Linkerd (same and even easier with Istio), we can make sure that only authorized services can talk to meshed ones. So, with Linkerd, we would not end up in the same situation:
First thing to notice, we simply use the service name to contact our target because there is no such Dapr route in this case nor any service discovery feature. However, because Linkerd leverages the Ambassador pattern, which intercepts all network calls coming in and going outside of a pod. Therefore, when the application container of a Linkerd-injected pod tries to connect to another service, Linkerd’s sidecar performs the call to the target, which lands onto the other sidecar (if the target is well a Linkerd-injected service of course). In this case no issue. Of course, as for Dapr, nothing prevents us from directly calling the pod IP of the target. Yet, from an injected pod, the Linkerd sidecar will intercept that call. From a non-injected pod, there is no such outbound sidecar, but our target’s sidecar will still tackle inbound calls, so you can’t bypass it. By default, because Linkerd does not enforce mTLS, it will let it go, unless you define fine-grained authorizations as shown below:
apiVersion: policy.linkerd.io/v1beta1
kind: Server
metadata:
namespace: rest-calculator
name: multiplication
spec:
podSelector:
matchLabels:
app: multiplication
port: 80
proxyProtocol: HTTP/1
—
apiVersion: policy.linkerd.io/v1beta1
kind: ServerAuthorization
metadata:
namespace: rest-calculator
name: multiplication-from-mathfanboy
spec:
server:
name: multiplication
client:
meshTLS:
identities:
– mathfanboy
– percentage
In this case, only MathFanBoy and and Percentage will be allowed to call the multiplication operation. In other words, Linkerd allows us to enforce mTLS, whatever route is taken. With Istio, it’s even easier since you can simply enforce mTLS through the global mesh config. You do not even need to specify explicit authorization policies (although it is a best practice). Just to illustrate the above diagrams, here are some screenshots showing these routes in action:
I’m first calling the multiplication operation from the addition pod, while we told Dapr that only MathFanboy and Percentage could call multiplication. As you can see, the Dapr policy kicks in and forbids the call as expected.
but while this policy is defined, I can still call the multiplication using a direct route (pod IP):
and the same applies to non-injected pods of course.
While, with the Linkerd policy in place, there will be no way to call multiplication other than from MathFanBoy and Percentage. For sake of brevity, I won’t show you the screenshots but trust me, you will be blocked if you try.
Let us now focus on the injection process which will clarify what is going on behind the scenes.
Injection process Dapr vs Service Mesh
Both Dapr and Service Meshes will inject application pods according to annotations. They both have controllers in charge of injecting their victims. However, when looking at the lifecycle of a Dapr-injected pod as well as a Linkerd-injected pod, we can see noticeable differences.
When injecting Linkerd to an application, in plain Kubenet (not using the CNI plugin), we notice that Linkerd injects not only the sidecar but also an Init Container:
When looking more closely at the init container, we can see that it requires a few capabilities such as NET_ADMIN and NET_RAW, and that is because the init container will rewrite IP tables to make sure network traffic entering and leaving the pod is captured by Linkerd’s sidecar. When using Linkerd together with a CNI, the same principle applies but route tables are not rewritten by the init container. No matter how you use Linkerd, all traffic is redirected to its sidecar. This means that the sidecar cannot be bypassed.
When injecting Dapr, we see that there is no Init Container and only the daprd container (sidecar) is injected:
There is no rewrite of any IP table, meaning that the sidecar can be bypassed without any problem, thus bypass Dapr routes and Dapr policies. In other words, we can easily escape the Dapr world.
Wrapping up
As stated initially, I mostly focused on the impact of Dapr or a Service Mesh on the application itself and how the overall protection given by mTLS varies according to whether you use Dapr or a Service Mesh. I hope it is clear by now that Dapr is definitely an application framework that infuses the application code, while a Service Mesh is completely transparent for the application. Note that the latter is only true when using a decent Service Mesh. By decent, I mean something stable, performant and reliable. I have been recently confronted to a Mesh that I will not name here, but this was a true nightmare for the application and it kept breaking it.
Although Dapr & Service Meshes seem to have overlapping features, they are not equally covering the workloads. With regards to the initial question about when to use Dapr or a Service Mesh, I would take the following elements into account:
– For distributed architectures that are also heavily event-driven, Dapr is a no brainer because Dapr brings many features on the table to interact with message and event brokers, as well as state stores. Yet, Service Meshes could still help measure performance, spot issues and load balance traffic by understanding protocols such as HTTP/2, gRPC, etc. Meshes would also help in the release process of the different services, splitting traffic across versions, etc.
– For heterogeneous workloads, with a mix of APIs, self-hosted databases, self-hosted message brokers (such as Rabbit MQ), etc., I would go for Service Meshes.
– If the trigger of choosing a solution is more security-centric, I would go for a Service Mesh
– If you need to satisfy all of the above, I would combine Dapr and a Service Mesh for microservices, while using Service Mesh only for the other types of workloads. However, when combining, you must consider the following aspects:
– Disable Dapr’s mTLS and let the Service Mesh manage this, including fine-grained authorization policies. Beware that doing so, you would loose some Dapr functionality such as defining ACLs on the components
– Evaluate the impact on the overall performance as you would have two sidecars instead of one. From that perspective, I would not mix Istio & Dapr together, unless Istio’s performance dramatically improves over time.
– Evaluate the impact on the running costs because each sidecar will consume a certain amount of CPU and memory, which you will have to pay for.
– Assess whether your Mesh goes well with Dapr. While an application is agnostic to a mesh, Dapr is not, because Dapr also manipulates K8s objects such as K8s services, ports, etc. There might be conflicts between what the mesh is doing and what Dapr is doing. I have seen Dapr and Linkerd be used together without any issues, but I’ve also seen some Istio features being broken because of Dapr naming its ports dapr-http instead of http. I reported this problem to the Dapr team 2 years ago but they didn’t change anything.
Microsoft Tech Community – Latest Blogs –Read More
Microsoft Viva Glint Monthly Newsletter – January 2024
Happy New Year from our Microsoft Viva Glint family!
Welcome to the January edition of our Viva Glint newsletter! This communication is full of information that will help you get the most from your Viva Glint programs.
Our next feature release
Viva Glint’s next feature release is scheduled for January 13, 2024. Your dashboard will provide date and timing details two or three days before the release.
In your Viva Glint programs
Customize a message to your survey takers – Within General Settings, enter any org-specific guidance that you’d like added to your existing privacy statement. This message will apply to all new and scheduled surveys and can be translated into additional languages. Within a specific survey, go ahead and edit that statement in Program Setup, as needed.
Customize your logo and survey email content, too! Your customization capabilities are enhanced! By following in-platform guidance, we’re empowering you to take the reins and deliver customized email communications that meet Microsoft compliance requirements. Use the Microsoft Admin Center to set a custom logo and sending domain to create customized survey emails in Viva Glint that resonate with your organization.
We are just a few weeks away from the Copilot in Viva Glint Private Preview! This innovative new tool within the Viva Glint platform is designed to help organizational leaders and HR analysts easily understand, interpret, and act on employee feedback. Say “goodbye” to the tedious task of sifting through thousands of comments – Microsoft Copilot in Viva Glint provides short, natural language summaries that accurately represent the feedback you need to see.
Changes to how you’ll set up your employee attributes – As an admin, the changes we’re rolling out will allow you to view and edit your original schema after its initial setup, incorporate user time zones, setup survey and dashboard language fields, set up personal email fields for surveying exiting employees, and we’ve updated tenure buckets, too. Read about the new attribute setup experience.
News from Viva People Science
The Microsoft Viva People Science team has been busy hosting events and authoring blogs on current tips and trends to empower you to improve your business. Check out our most recent content:
• People Science Predictions: The impact of AI on the Employee Experience – Read our blog from the Viva People Science team, who has been busy making predictions about how AI is likely to impact employees and organizations. Read the 12 Predictions blog.
Connect and learn with Glint
Join us for our first Viva Glint: Ask the Experts session! Use this early registration link to join our new series to have questions answered about your Viva Glint programs.
We have platform trainings for Viva Glint admins and managers on Microsoft Learn! Use step-by-step guides to understand our dashboards, reports, and how to have quality team conversations.
All Viva Glint users can benefit from our new module – Navigate and Share your Viva Glint results module located on Microsoft Learn. Use these step-by-step guides to understand our dashboards, reports, and how to have quality team conversations.
Thanks to all our Viva Glint Learning Circles first-time joiners! The Viva Glint Learning Circles program is open to all customers who want to connect with other like-minded talent professionals to share knowledge, experiences, and challenges related to employee experience. Watch for news of our next sign-up period in this monthly newsletter.
How are we doing?
Please share feedback with your Customer Experience Program Manager (CxPM) if you have one, or by emailing us here. Also, if you do not want to receive these emails in the future, please let us know and you will be removed from the distribution list. Conversely, if there are people on your teams that should be receiving this monthly update, send us those emails and we’ll be sure they are added.
Microsoft Tech Community – Latest Blogs –Read More
Partner Blog | Gain AI and cloud technical skills with Microsoft Depth Workshops
Amid the increasing integration of AI into various business applications, cloud and AI skilling is essential for partners to reach their full potential. Microsoft is committed to helping address these skilling needs so that partners can help customers enable new services and products that use these quickly advancing technologies. Our partners have asked for our help in giving their employees Microsoft Azure Depth Enablement—in-depth knowledge specifically focused on Azure solutions for the Microsoft platforms and technology they use every day.
As part of our training efforts, Microsoft is now offering partner employees the opportunity to elevate their technical skills in specific lines of technology related to Microsoft AI and the Microsoft Cloud. These multi-day Microsoft Depth Workshops focus on practical technical aspects, including architecture and implementation considerations.
We encourage all partner technical learners to register for the skilling events relevant to their business to enhance architecting, deployment, and implementation skills and help unlock the capabilities of AI and cloud technology and applications.
Hone your technical skills in Microsoft Azure, Business Applications, and Security solutions
Microsoft Depth Workshops embody their titles by offering deeper, hands-on training that builds on advanced certifications. Their goal is to equip partner employees with the knowledge to help customers confidently adopt and optimize Microsoft AI and cloud products and services.
Continue reading here
Microsoft Tech Community – Latest Blogs –Read More


